Schluter®-DITRA & DITRA-XL
Uncoupling and waterproofing membrane

- Provides uncoupling, waterproofing, vapor management, and heavy load distribution to ensure the durability and integrity of tile installations
- Quick and easy to install on top of concrete, plywood, OSB, gypsum, existing vinyl floors, structural planks, sub-floors, and radiant heated floors
- Convenient tile underlayment alternative to cement backer board or plywood
- Use DITRA for ceramic tile installations over single layer plywood or OSB subfloors on joists spaced up to 19.2" o.c.
- DITRA is only 1/8" (3.5 mm)-thick to provide the thinnest possible assembly without sacrificing performance
- DITRA features cutting grooves for precise cuts and air release vents at the corners of the cutback cavities for faster filling
- Use DITRA-XL for ceramic tile installations over single layer plywood or OSB subfloors on joists spaced up to 24" o.c.
- DITRA-XL is 5/16” (7 mm)-thick to create an even transition between typical 5/16” (7 mm)-thick tile and 3/4” (19 mm)-thick hardwood flooring
- DITRA-XL is ideal for installations requiring greater movement accommodation, such as applications using natural stone tile, large-format tile, etc.
- DITRA and DITRA-XL are for interior use only, dry or wet areas


Find recommended accessories here
Membrane Estimator
Calculate all your membrane requirements for your project.
Schluter®-DITRA is a polyethylene membrane with a grid structure of square cavities, each cut back in a dovetail configuration, and an anchoring fleece laminated to the underside. The anchoring fleece is embedded in thin-set mortar to provide a mechanical bond to the substrate. Tile is installed over DITRA using the thin-bed method in such a way that the mortar becomes mechanically anchored in the square, cutback cavities of the matting. Designed specifically for ceramic tile and dimension stone installations, DITRA serves as an uncoupling layer, waterproofing membrane, and vapor management layer that accommodates moisture from beneath the tile covering. Further, DITRA performs all these functions while still providing adequate support/load distribution for the tile covering. The combination of these four essential functions allows for the successful installation of tile over a wide range of substrates, including plywood/ OSB, concrete, gypsum, heated floors, etc. DITRA is 1/8" (3.5 mm) thick, which minimizes tile assembly thickness and reduces transitions to lower surface coverings (e.g., carpet, engineered wood, and vinyl). DITRA allows for ceramic tile application over single-layer plywood or OSB subfloors on joists spaced up to 19.2" (488 mm) o.c.
Uncoupling
Tile has been successfully installed for thousands of years by incorporating an uncoupling layer, or forgiving shear interface, within the tile assembly. DITRA provides uncoupling through its open rib structure, which allows for in-plane movement that effectively neutralizes the differential movement stresses between the substrate and the tile, thus eliminating the major cause of cracking and delaminating of the tiled surface
Waterproofing
DITRA provides reliable waterproofing in interior applications. Its polyethylene composition protects the substrate from moisture penetration, which is particularly important in today’s building environment where most substrates are moisture-sensitive.
Vapor management
The distinguishing feature of DITRA is the existence of free space created by the configured channels on the underside of the matting. The free space provides a route for excess moisture and vapor to escape from the substrate that could otherwise cause damage to the tile layer above. Thus, DITRA effectively manages moisture beneath the tile covering.
Support/load distribution
When placed on a solid foundation, columns or pillars can support tremendous loads. The same physical principle applies to DITRA installations. Column-like mortar structures are formed in the cutback cavities of the matting. Loads are transferred from the tile covering through these column-like mortar structures to the substrate. Since the matting is virtually incompressible within the tile assembly, the advantages of uncoupling are achieved without sacrificing point load distribution capabilities. The ability of DITRA installations to support and distribute heavy loads while preserving the integrity of the tiled surface has been verified through extensive laboratory and field testing, including applications exposed to vehicular traffic.
Note: DITRA and DITRA-XL are for interior use only, dry or wet areas.
DITRA and DITRA-XL membranes do not require any special maintenance.
All substrates must be clean, even, and load bearing. Bond inhibiting surfaces must be removed prior to the application of DITRA. For complete installation guidelines and warranty criteria, please refer to the downloadable Schluter®-DITRA Installation Handbook or to the installation video online.
Note: Type, thickness, and format of the tile or stone surface covering must be suitable for the intended application. Minimum tile format is 2" x 2" (5 cm x 5 cm).
Applications with tile formats less than 2” x 2” (5 cm x 5 cm) require special considerations, please contact Schluter-Systems Technical Services Representatives at 800-472-4588 (USA) or 800-667-8746 (Canada) for more information regarding installation requirements and warranty eligibility.
1. Using a thin-set mortar that is suitable for the substrate, apply the thin-set mortar (mixed to a fairly fluid consistency, but still able to hold a notch).
For DITRA use a 1/4" x 3/16" (6 mm x 5 mm) V-notched trowel, 5/16" x 5/16" (8 mm x 8 mm) V-notched trowel, or the DITRA trowel, which features a 11/64" x 11/64" (4.5 mm x 4.5 mm) square-notched design.
For DITRA-XL use a 1/4" x 1/4" (6 mm x 6 mm) square-notched trowel or the DITRA-XL trowel, which features a 1/4" x 1/4" (6 mm x 6 mm) square-notched design.
2. Apply DITRA or DITRA-XL to the floor, fleece side down. Solidly embed the matting into the mortar using a float, screed trowel, or DITRA-ROLLER*, making sure to observe the open time of the bonding mortar. If the mortar skins over prior to matting installation, remove and reapply.
*When using the DITRA-ROLLER, place a weight (e.g., bag(s) of mortar/grout or box of tile) not to exceed 75 lbs on the DITRA-ROLLER shelf. Slowly move the roller from one end of the matting to the other, slightly overlapping successive passes.
3. Lift up a corner of the matting to check coverage. Proper installation results in full contact between the fleece webbing and the thin-set mortar. Simply abut end and side sections of adjacent sheets. Note: Coverage may vary with mortar consistency, angle at which the trowel is held, substrate flatness, etc. If full coverage is not achieved, remove and reapply, making sure to verify proper mortar consistency and application.
4. Tile can be installed over DITRA and DITRA-XL immediately; no need to wait for the mortar to cure. Fill the cut-back cavities with Schluter SET, Schluter ALL-SET, Schluter FAST-SET, or unmodified thin-set mortar and comb additional mortar over the matting using a trowel that is appropriate for the size of the tile. Solidly embed the tiles in the setting material. Periodically remove and check a tile to ensure that full coverage is being attained. Back-buttering is a useful way to help ensure proper coverage, particularly when installing large-format tiles (e.g., 12" x 12" (305 mm x 305 mm) and larger).
Note: To bond DITRA to the substrate, using the DITRA trowel: Use one 50 lb. (22.68 kg) bag of mortar per 150 ft2 (10.7 m2). To bond DITRA-XL to the substrate, using the DITRA-XL trowel: Use one 50 lb. (22.68 kg) bag of mortar per 100 ft2 (9.3 m2). To bond the tile to the DITRA, using a 1/4" x 3/8" (6 mm x 10 mm) square- or U-notched trowel: Use one 50 lb (22.68 kg) bag of mortar per 40 - 50 ft2 (3.7 - 4.6 m2). To bond the tile to the DITRA-XL, using a 1/4" x 3/8" (6 mm x 10 mm) square- or U-notched trowel: Use one 50 lb (22.68 kg) bag of mortar per 35 - 45 ft2 (3.3 - 4.2 m2).
Waterproofing
The following steps are required for waterproofing only:
1. At the joints, fill the cut-back cavities with Schluter SET, Schluter ALL-SET, Schluter FAST-SET, or unmodified thin-set mortar, approximately 8" (203 mm) wide, centered over the joint.
2. Comb additional Schluter SET, Schluter ALL-SET, Schluter FAST-SET, or unmodified thin-set mortar over the joint using a 1/4" x 3/16" (6 mm x 5 mm) V-notched trowel or the Schluter®-KERDI trowel, which features a 1/8" x 1/8" (3 mm x 3 mm) square-notched design.
3. Using the flat side of the trowel, firmly press the 5" (127 mm)-wide Schluter®-KERDI-BAND into the mortar to ensure 100% coverage and to remove excess mortar and air pockets.
4. At all wall junctions, apply KERDI-BAND as described in steps 1-3, ensuring a minimum of 2" overlap on to DITRA/DITRA-XL.
Notes: KERDI-BAND must overlap DITRA and DITRA-XL at seams and at floor/wall transitions by a minimum of 2" (50 mm) in order to maintain waterproof integrity. In some applications the vertical section of the floor/wall transition will not accept a bond to Schluter SET, Schluter ALL-SET, Schluter FAST-SET, or unmodified thin-set mortar. Connections to such elements can be achieved using Schluter®-KERDI-FIX or suitable trowel-applied waterproofing materials, such as those that require atmospheric moisture to cure (e.g., urethane sealant).
For complete installation guidelines and warranty criteria please refer to the downloadable Schluter®-DITRA Installation Handbook and view the step-by-step installation videos available below.
Articles
FAQ
¿Se puede utilizar Schluter®-DITRA como membrana de control de sonido?
DITRA no pretende ser un sistema de control total de sonido, no obstante, proporciona un grado de atenuación acústica similar...
Read more¿Se puede instalar Schluter®-DITRA y Schluter®-DITRA-XL sobre pisos vinílicos?
Sí, Schluter®-DITRA o DITRA-XL pueden instalarse sobre vinilo. Algunas limitaciones son las siguientes: 1- El vinilo acolchado es...
Read more¿Se puede utilizar mosaico con Schluter®-DITRA o Schluter®-DITRA-XL?
El formato mínimo de baldosa requerido para usar con DITRA es de 2" x 2" (50 mm x 50 mm). Llame a Schluter®-Systems...
Read more¿Es necesario impermeabilizar Schluter®-DITRA y Schluter®-DITRA-XL?
Impermeabilizar el piso no es obligatorio, pero puede ser beneficioso en algunos casos. Los métodos de construcción actuales, que incluyen el uso de...
Read more¿Se puede instalar Schluter®-DITRA o Schluter®-DITRA-XL sobre pisos de madera dura?
No recomendamos ni garantizamos la instalación de DITRA o DITRA-XL sobre pisos de madera existentes, ya que son muy inestables y difíciles de adherir...
Read more¿Puedo usar compuestos autonivelantes sobre Schluter®-DITRA o Schluter®-DITRA-XL?
DITRA y DITRA-XL se han diseñado y probado para aplicaciones de baldosas cerámicas y piedra natural con capa fina ...
Read moreSi utilizo un autonivelante sobre mi contrapiso de madera contrachapada, ¿qué tipo de mortero de capa fina debo utilizar para instalar Schluter®-DITRA o DITRA-XL?
Recomendamos Schluter SET™ , ALL-SET™ , FAST-SET™, o mortero de capa fina no modificado sobre un piso que ha sido nivelado con un producto autonivelante.
Read more¿Cuánto mortero de capa fina se utilizará con Schluter®-DITRA o Schluter®-DITRA-XL?
A continuación, se muestra la cobertura estimada de mortero de capa fina para cada membrana. La cobertura puede variar con la consistencia del mortero, el ángulo...
Read more¿Qué tamaño de llana dentada debo usar para instalar Schluter-DITRA y Schluter®-DITRA-XL?
Para DITRA utilice una llana dentada en V de 1/4" x 3/16" (6 mm x 5 mm), 5/16" x 5/16"...
Read more¿Cuál es la consistencia adecuada del mortero de capa fina para instalar Schluter®-DITRA y Schluter®-DITRA-XL?
Utilizando un mortero de capa fina adecuado para el substrato, aplique el mortero de capa fina (mezclado hasta obtener una consistencia bastante fluida, pero capaz de mantener una cresta)...
Read more¿Cuánto tiempo tengo que esperar antes de poder instalar baldosas sobre la membrana Schluter®-DITRA?
Una vez instalada DITRA sobre substrato, las baldosas pueden instalarse de inmediato. No es necesario esperar a que el mortero haya fraguado...
Read more¿Qué tipo de mortero de capa fina debo usar cuando coloco baldosas sobre Schluter®-DITRA y Schluter®-DITRA-XL?
Schluter-Systems requiere el uso de Schluter SET™ , ALL-SET™ , FAST-SET™, o de un mortero de capa fina no modificado que cumpla con los requisitos de ANSI A118.1 para instalar...
Read more¿Por qué utilizar Schluter®-DITRA en mi instalación de baldosas?
Las baldosas de cerámica y piedra son duraderas, fáciles de mantener e higiénicas, y representan el revestimiento ideal...
Read moreEstoy planeando instalar mis baldosas utilizando Schluter®-DITRA. ¿Por dónde empiezo?
Lo primero que hay que hacer es planificar la instalación según el Manual de instalación de Schluter-DITRA...
Read more¿Qué tipo de mortero de capa fina debo utilizar para instalar Schluter-DITRA?
El tipo de mortero de capa fina utilizado para instalar DITRA depende del material del substrato. Por ejemplo, para colocar DITRA sobre contrachapado...
Read more¿Puedo utilizar un mortero de capa fina premezclado para instalar Schluter-DITRA y las baldosas?
No. Schluter-Systems no recomienda el uso de morteros de capa fina premezclados (masillas/adhesivos) en ninguna instalación de DITRA.
Read more¿Cómo sé si el mortero de capa fina es modificado o no modificado?
En general, el mortero de capa fina no modificado es una combinación de cemento Portland, arena y agentes de retención de agua que se mezclan...
Read more¿Son necesarias las juntas de movimiento cuando utilizo Schluter-DITRA en mi instalación de baldosas?
Sí. DITRA no elimina la necesidad de juntas de movimiento. Las juntas de movimiento son esenciales en cualquier instalación para prevenir…
Read more¿Puedo instalar baldosas de vidrio sobre Schluter®-DITRA?
He intentado trazar líneas de tiza sobre Schluter-DITRA antes de colocar las baldosas, pero la tiza se desprende fácilmente del plástico mientras estoy trabajando. ¿Qué puedo hacer?
Una opción es aplicar laca para el pelo sobre las líneas de tiza. No tiene que preocuparse de que la laca para el pelo rompa la unión porque...
Read moreNecesito quitar y volver a instalar una baldosa sobre Schluter-DITRA. ¿Cómo puedo hacerlo sin peligro?
Si está colocando las baldosas y el mortero de capa fina aún está fresco, simplemente pase la llana de margen por debajo de la superficie...
Read more¿Cuál es la diferencia entre Schluter®-DITRA y Schluter®-DITRA-XL?
Las membranas de desacoplamiento Schluter ofrecen las cuatro funciones esenciales para el éxito de la instalación de baldosas sobre una amplia gama de substratos...
Read more¿Puedo instalar un sistema eléctrico de calefacción del piso sobre Schluter®-DITRA y Schluter®-DITRA-XL?
Schluter®-Systems no recomienda la instalación de sistemas de calefacción del piso sobre DITRA o DITRA-XL...
Read more¿Cómo puedo obtener una garantía de por vida?
¿Puedo instalar baldosas de un tamaño inferior a 2”x2” sobre una membrana de desacoplamiento?
Las aplicaciones con formatos de baldosas inferiores a 2" x 2" (50 mm x 50 mm) requieren consideraciones especiales. Póngase en contacto con...
Read moreCAD drawings
Especifique nuestros productos utilizando el

Evaluaciones y listados de Schluter®-DITRA
Schluter®-DITRA fue evaluado por ICC-ES - ESR-2467Schluter®-DITRA está en la lista de cUPC®
Schluter®-DITRA está en la lista de ICC-ES - PMG-1204
Schluter®-DITRA-XL Evaluaciones y listados
Schluter®-DITRA-XL fue evaluado por ICC-ES - ESR-2467Schluter®-DITRA-XL está en la lista de cUPC®
Schluter®-DITRA-XL está en la lista de ICC-ES - PMG-1204

Watch & Learn
About the product
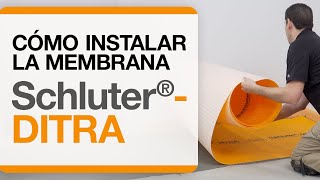
Cómo instalar la membrana impermeable y de desacoplamiento Schluter®-DITRA

Schluter®-DITRA: Cuatro funciones esenciales

Consejos para la instalación de Schluter®-DITRA
Find some existing tutorials and project documentation videos to learn how-to get the best out of our products - for more fun in your life, start now!
Watch more videos / playlists


