Shower Niche Installation Instructions
Schluter®-KERDI-BOARD-SN
Installing Adjacent to KERDI-BOARD
How to install the Schluter®-KERDI-BOARD-SN pre-fabricated shower niche within KERDI-BOARD Assembly
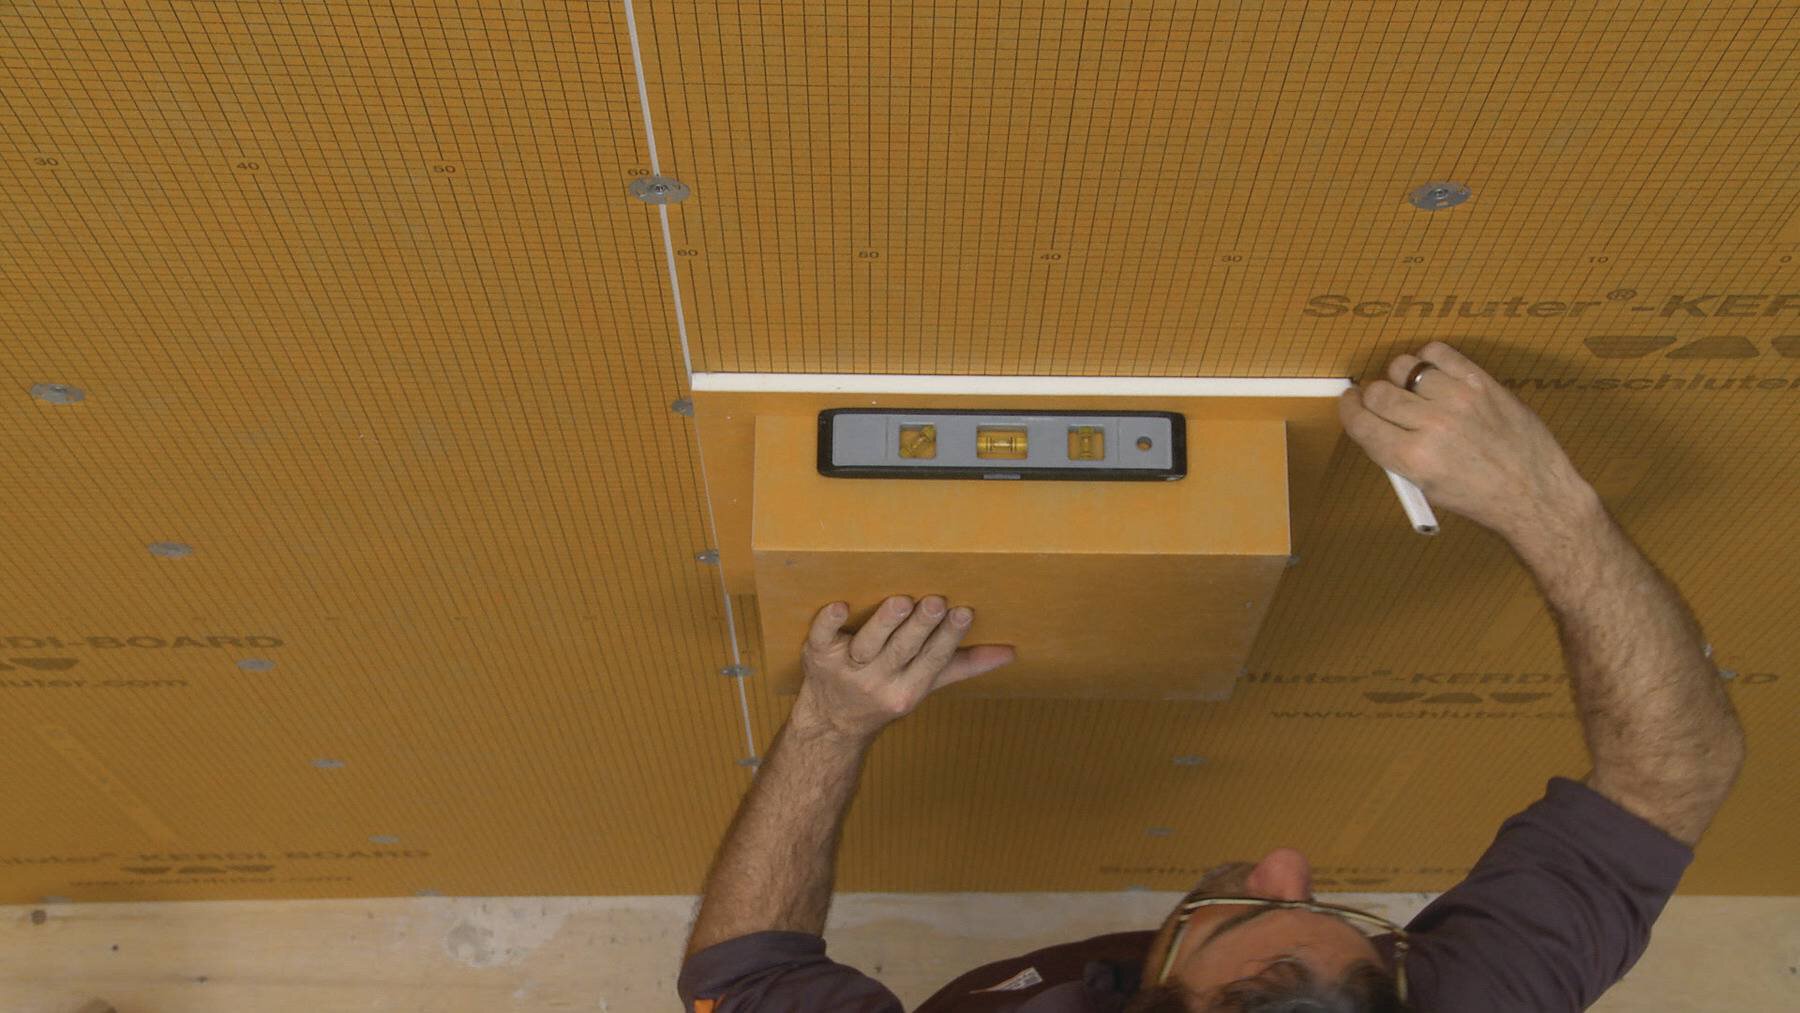
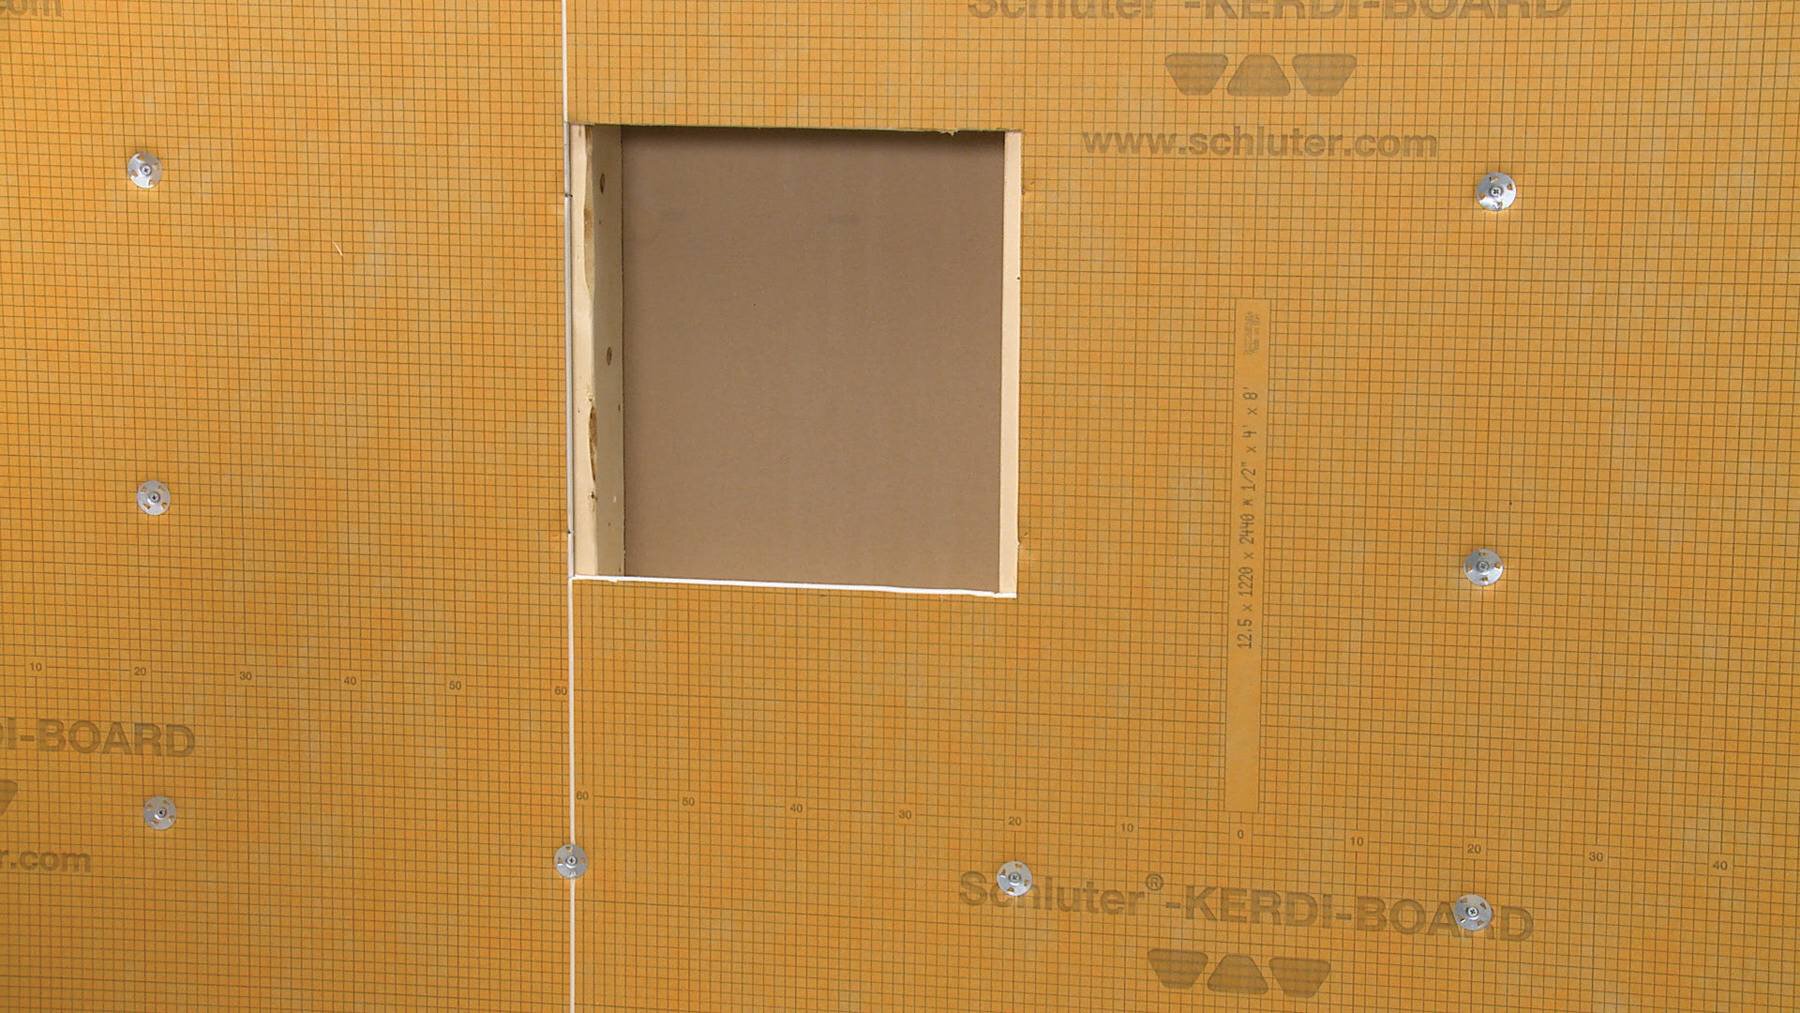
Determine the desired location for the shower niche and trace around the outside of the KERDI-BOARD-SN flange, making sure the lines are level and plumb. Cut and remove the KERDI-BOARD such that the niche will be supported on both sides by the studs or other wall framing.
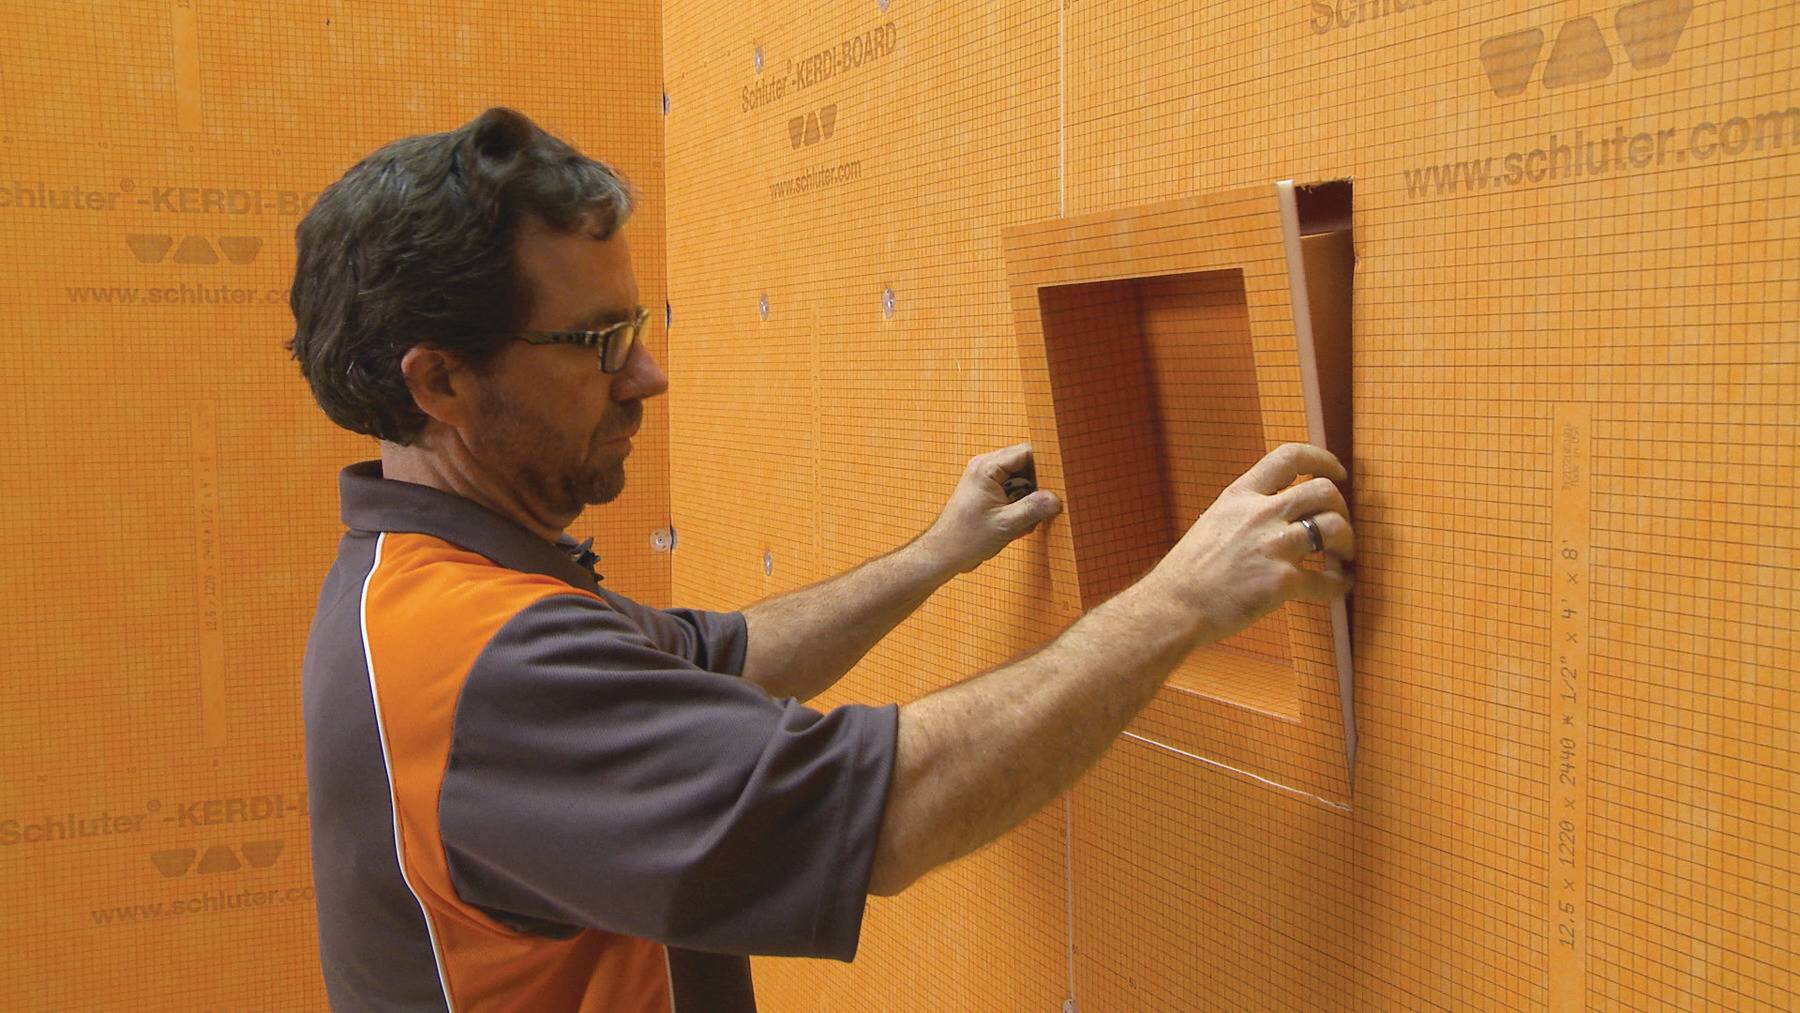

Insert the niche and fasten to the studs with the provided screws and washers or appropriate wood or metal screws. Place the fasteners along the seam between the KERDI-BOARD and the niche. Fasten all corners and limit fastener spacing to 12" (305 mm) o.c.
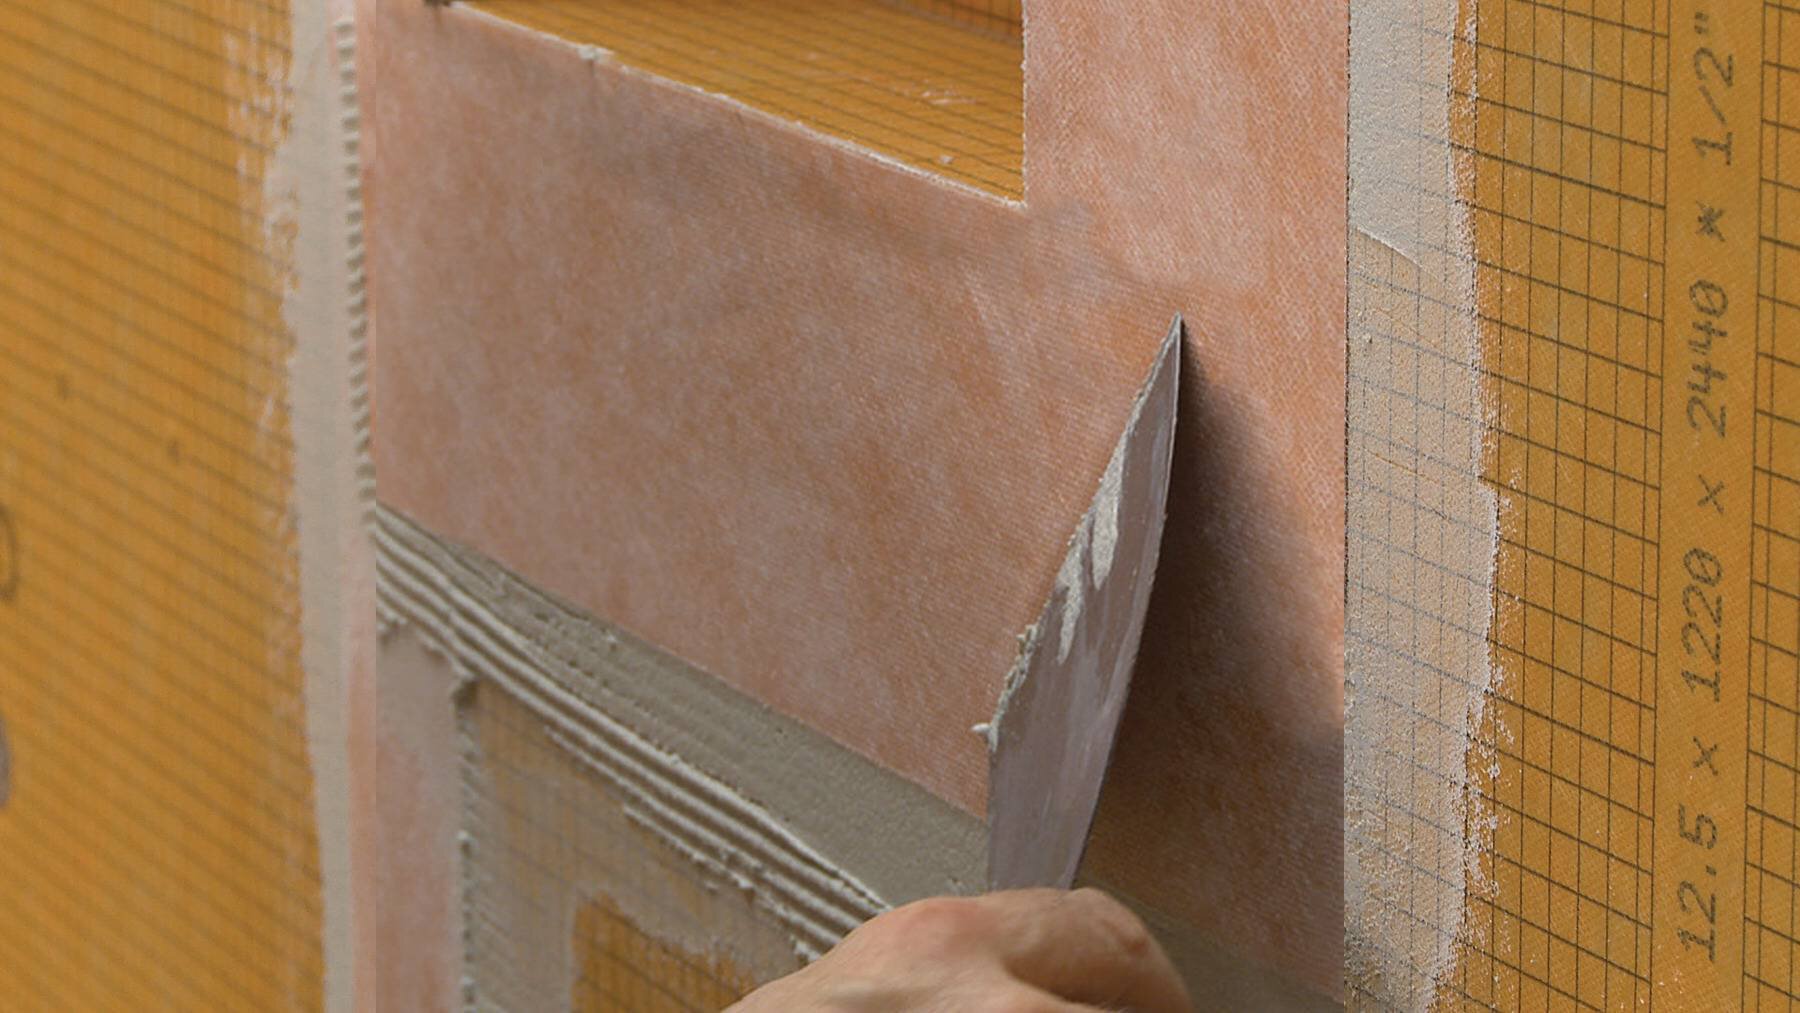
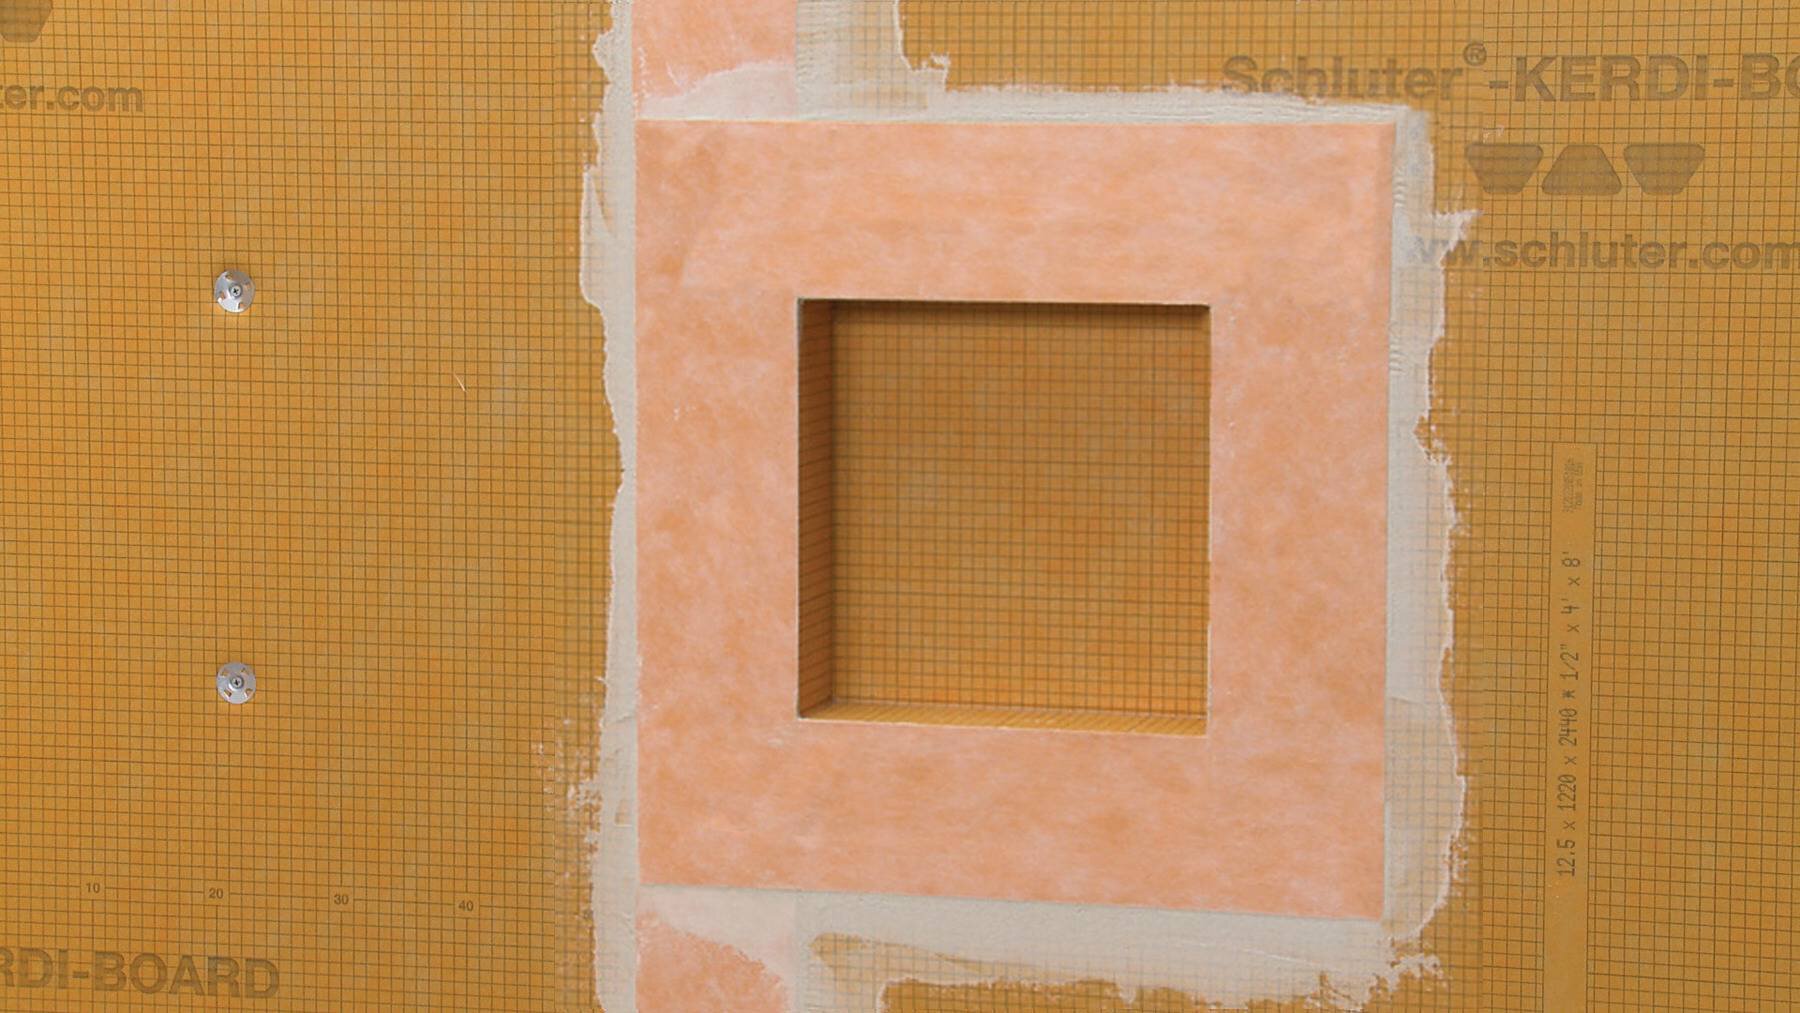
Connections between the niche and walls are made using the provided pre-cut KERDI-BAND frame, applied with Schluter SET®, ALL-SET®, FAST-SET®, or unmodified thin-set mortar (mixed to a fairly fluid consistency, yet still able to hold a notch).
Apply the thin-set mortar using a 1/4" x 3/16" (6 mm x 5 mm) V-notched trowel or the Schluter®-KERDI-TROWEL, which features a 1/8" x 1/8" (3 mm x 3 mm) square notched design.
Apply the membrane up to the niche opening and embed into the mortar throughout its entire surface to ensure proper adhesion. Remove any air pockets.
Installing Adjacent to Gypsum Board
How to install Schluter®-KERDI-BOARD-SN Niche with KERDI Membrane
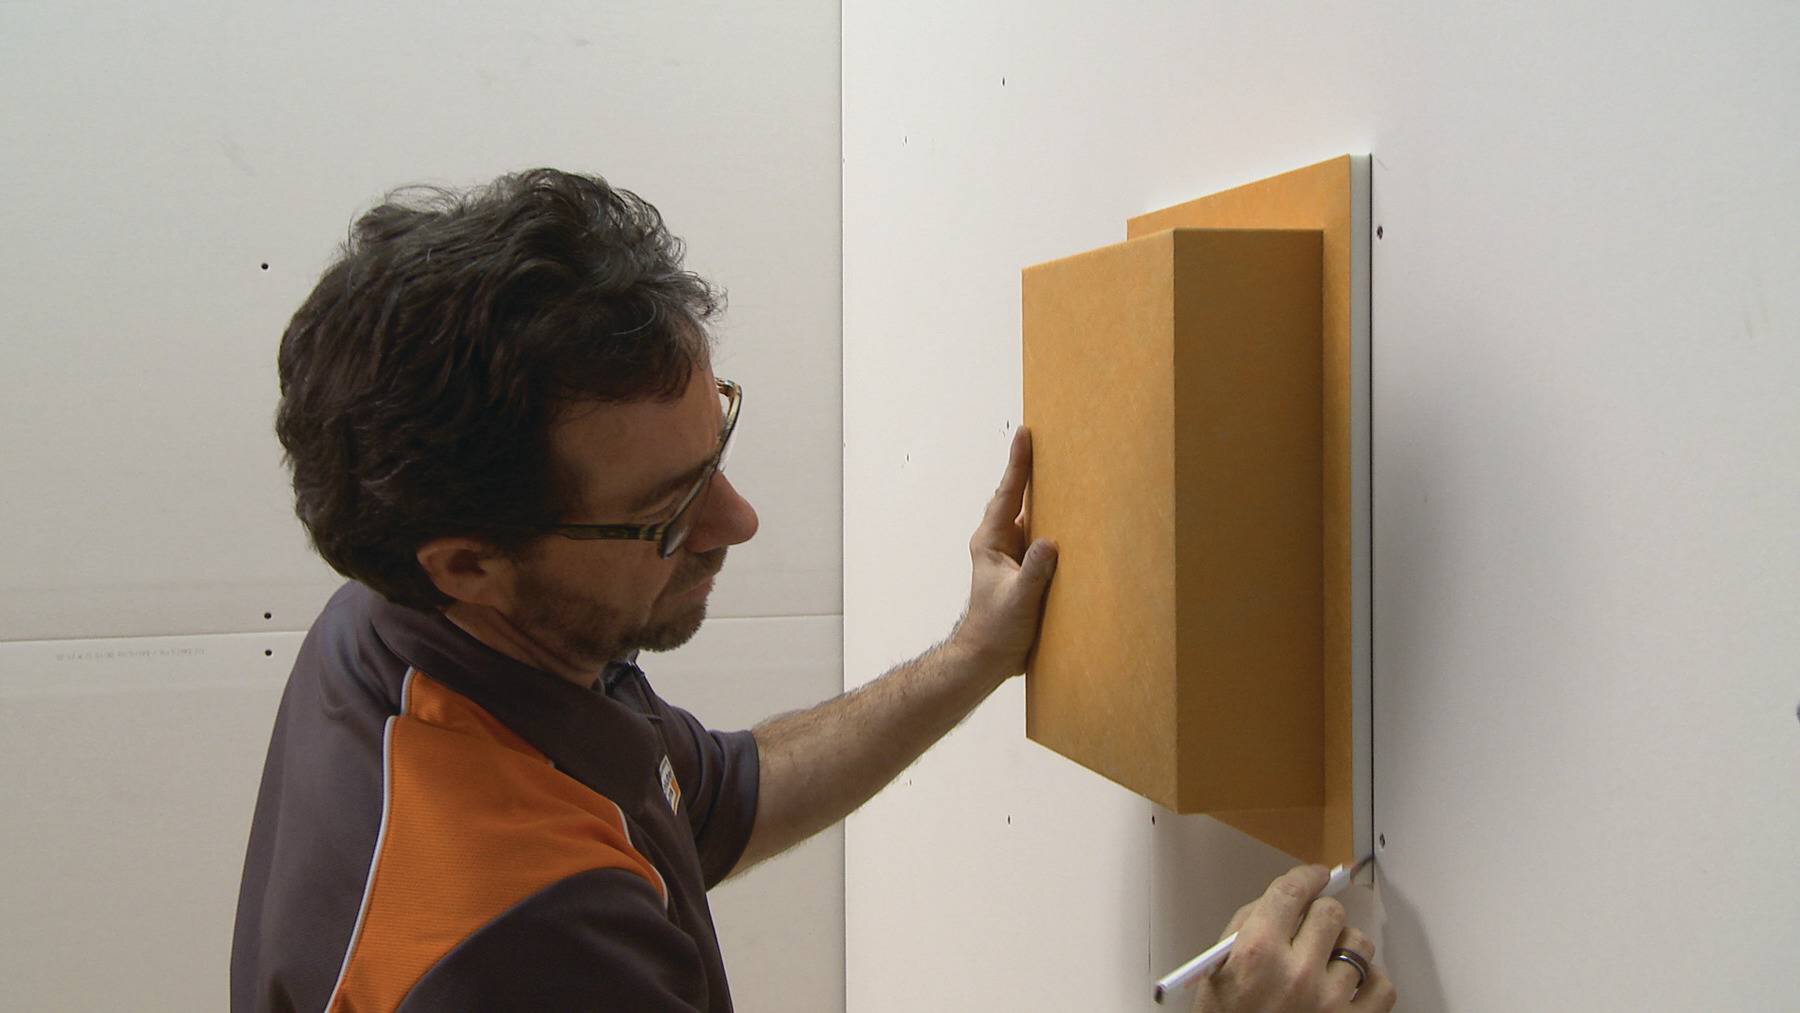
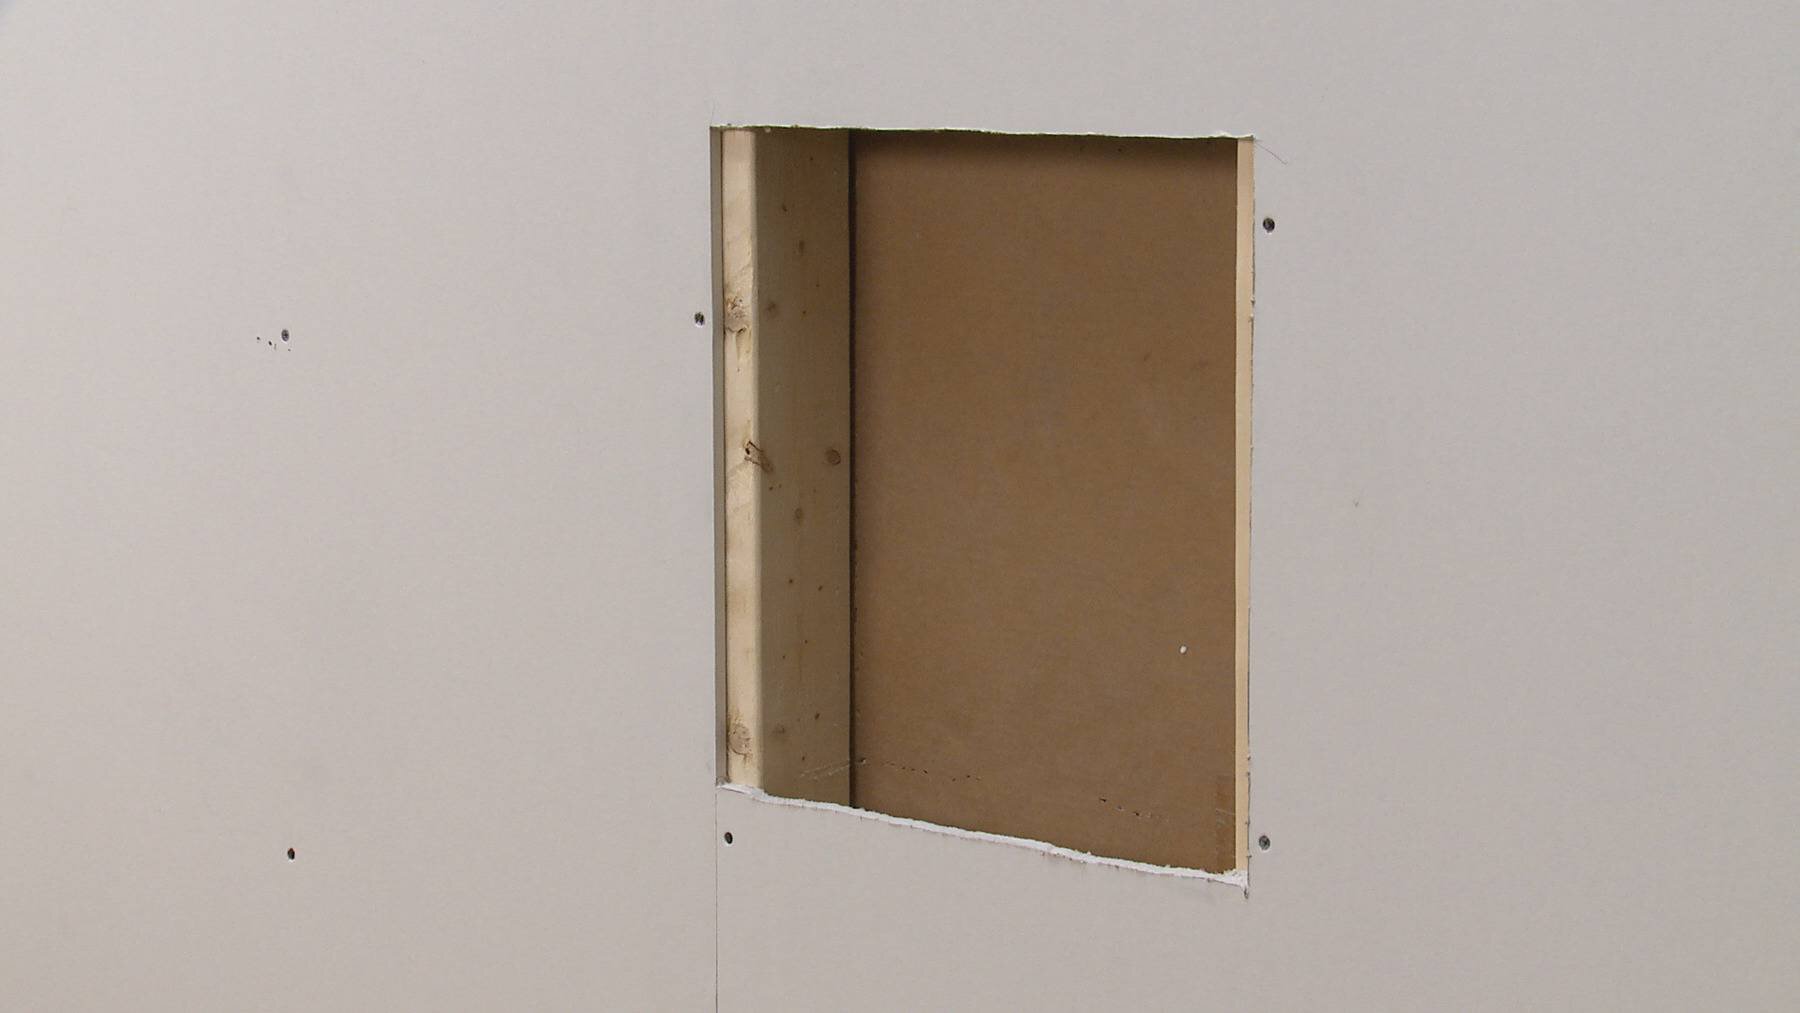
Determine the desired location for the shower niche and trace around the outside of the KERDI-BOARD-SN flange, making sure the lines are level and plumb. Cut and remove the wallboard so that the niche is supported on both sides by the studs or other wall framing.
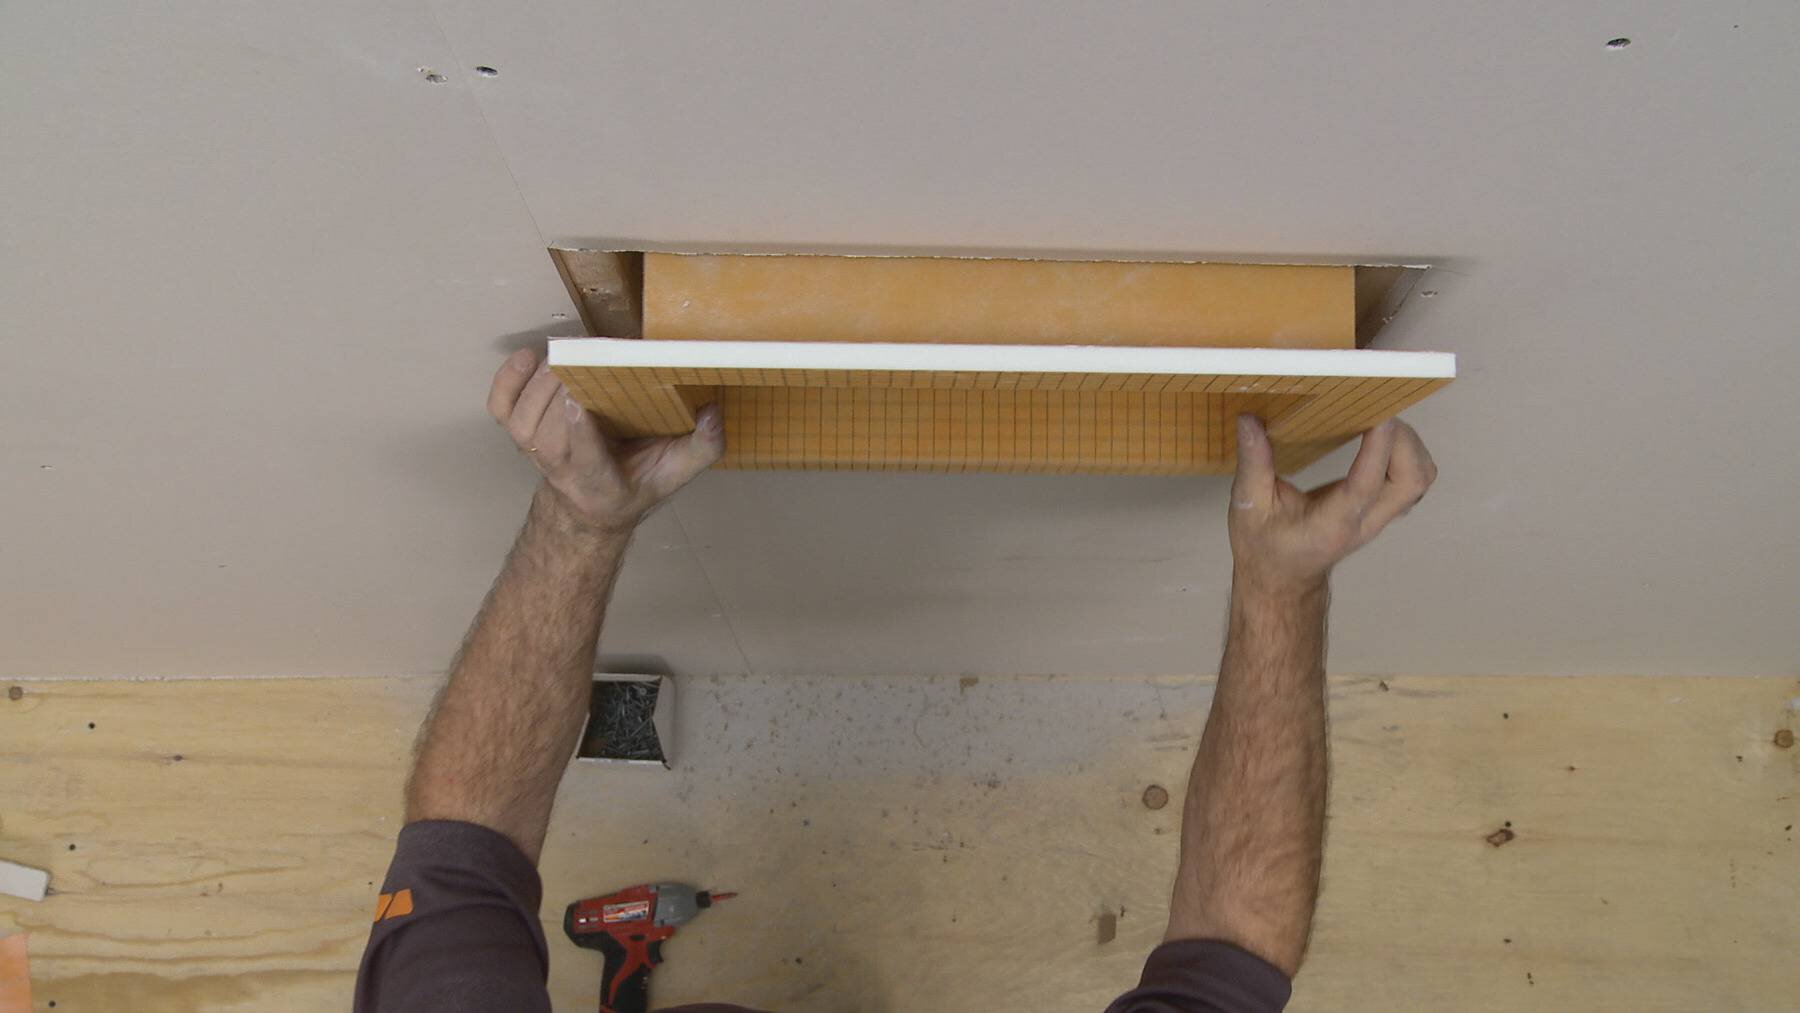
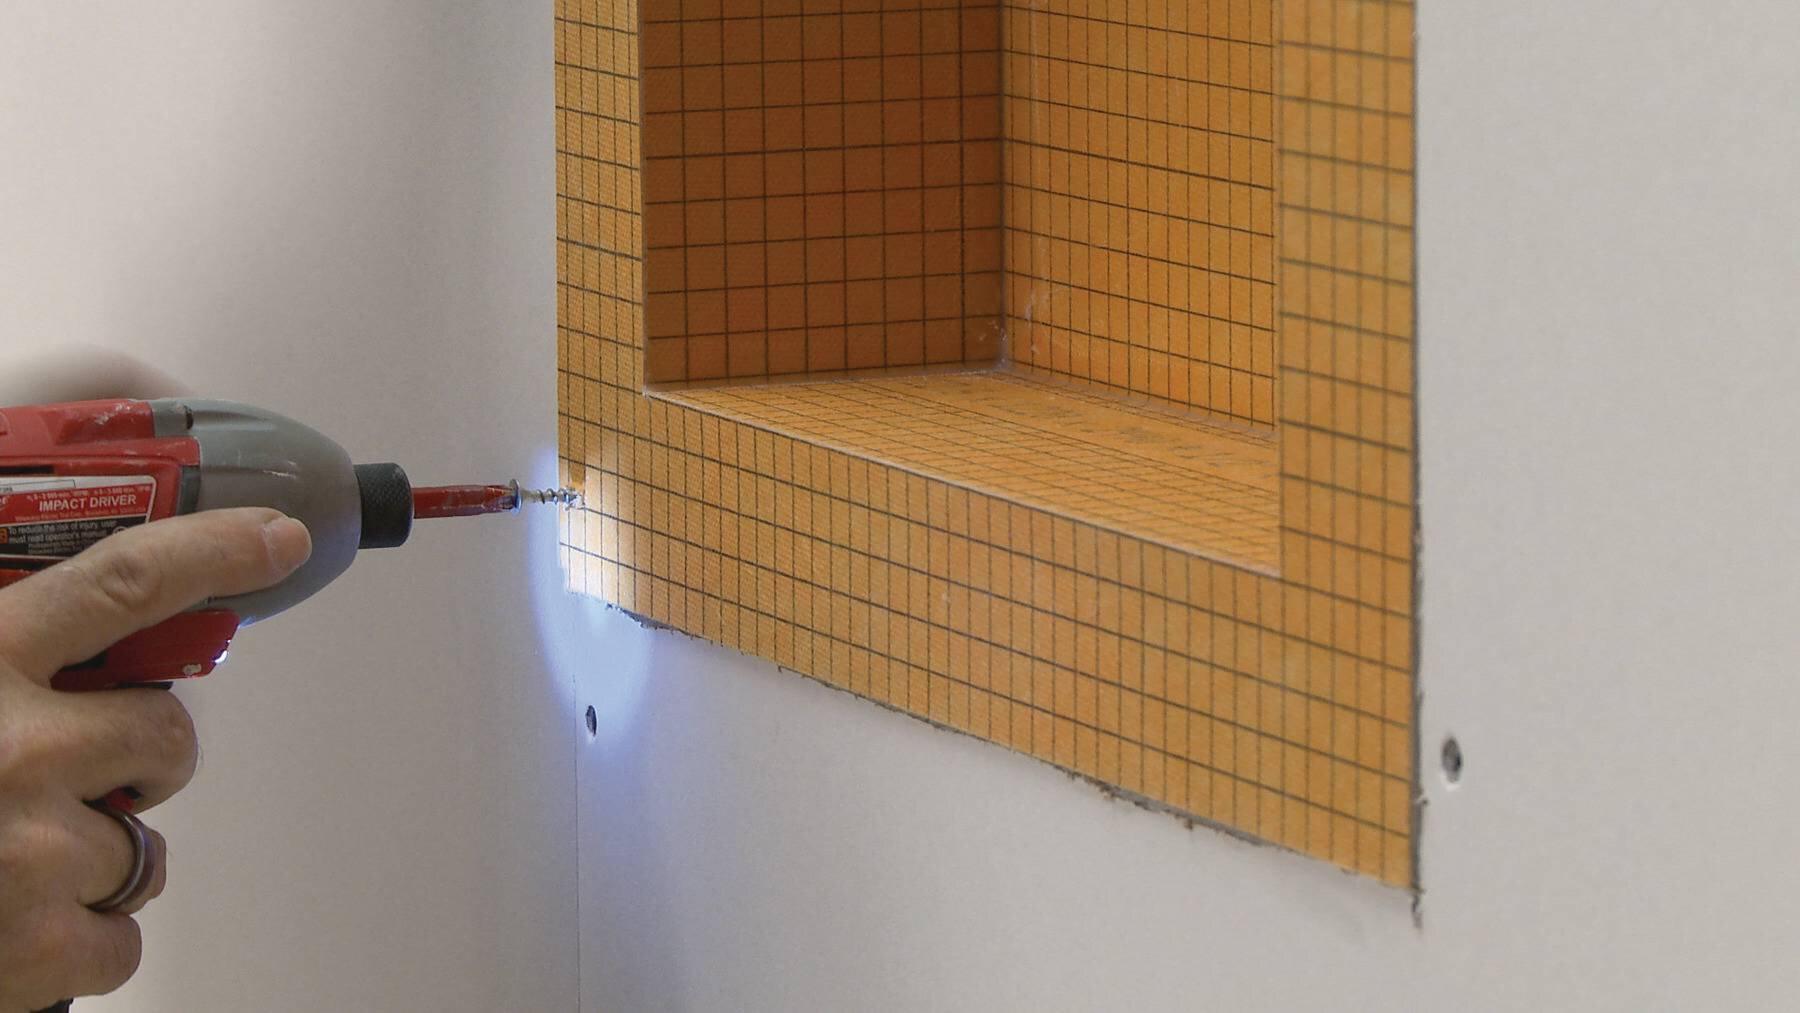
Insert the niche and fasten to the studs with the provided screws or appropriate wood or metal screws only (no washers). Place fasteners approximately 1/4" (6 mm) from the edges of the niche. Fasten all corners and limit fastener spacing to 12" (305 mm) o.c.
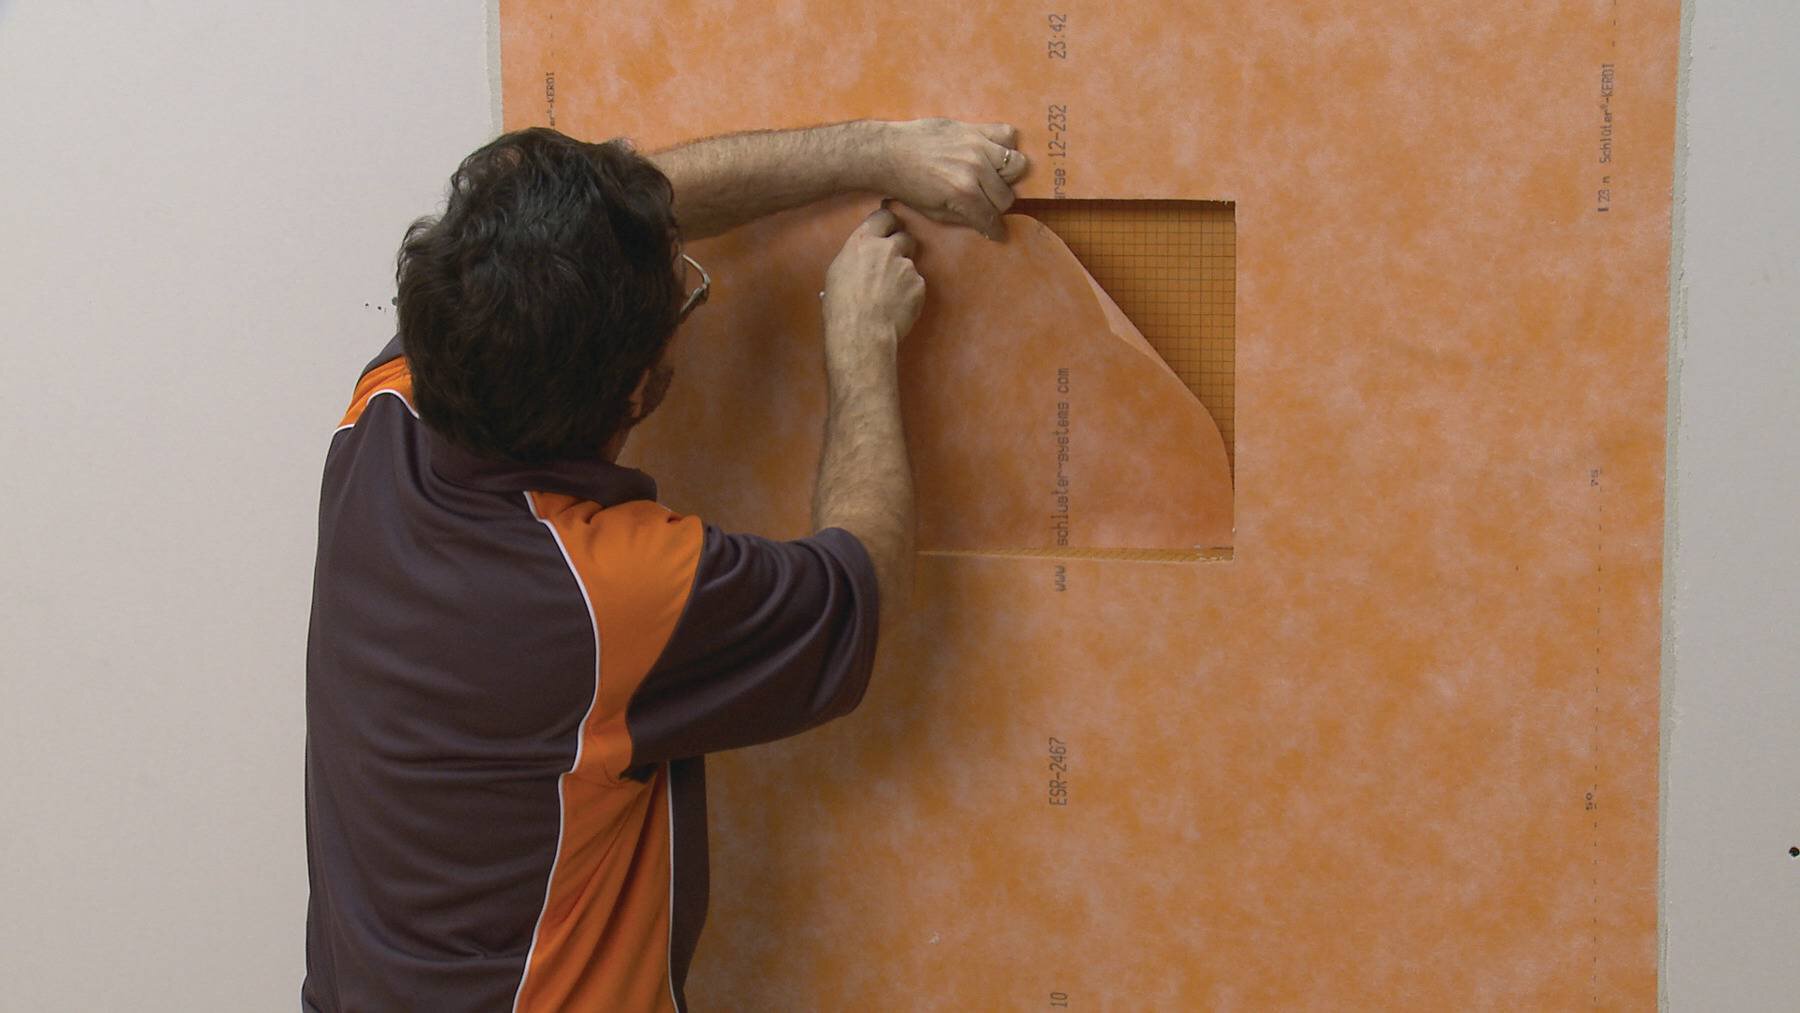
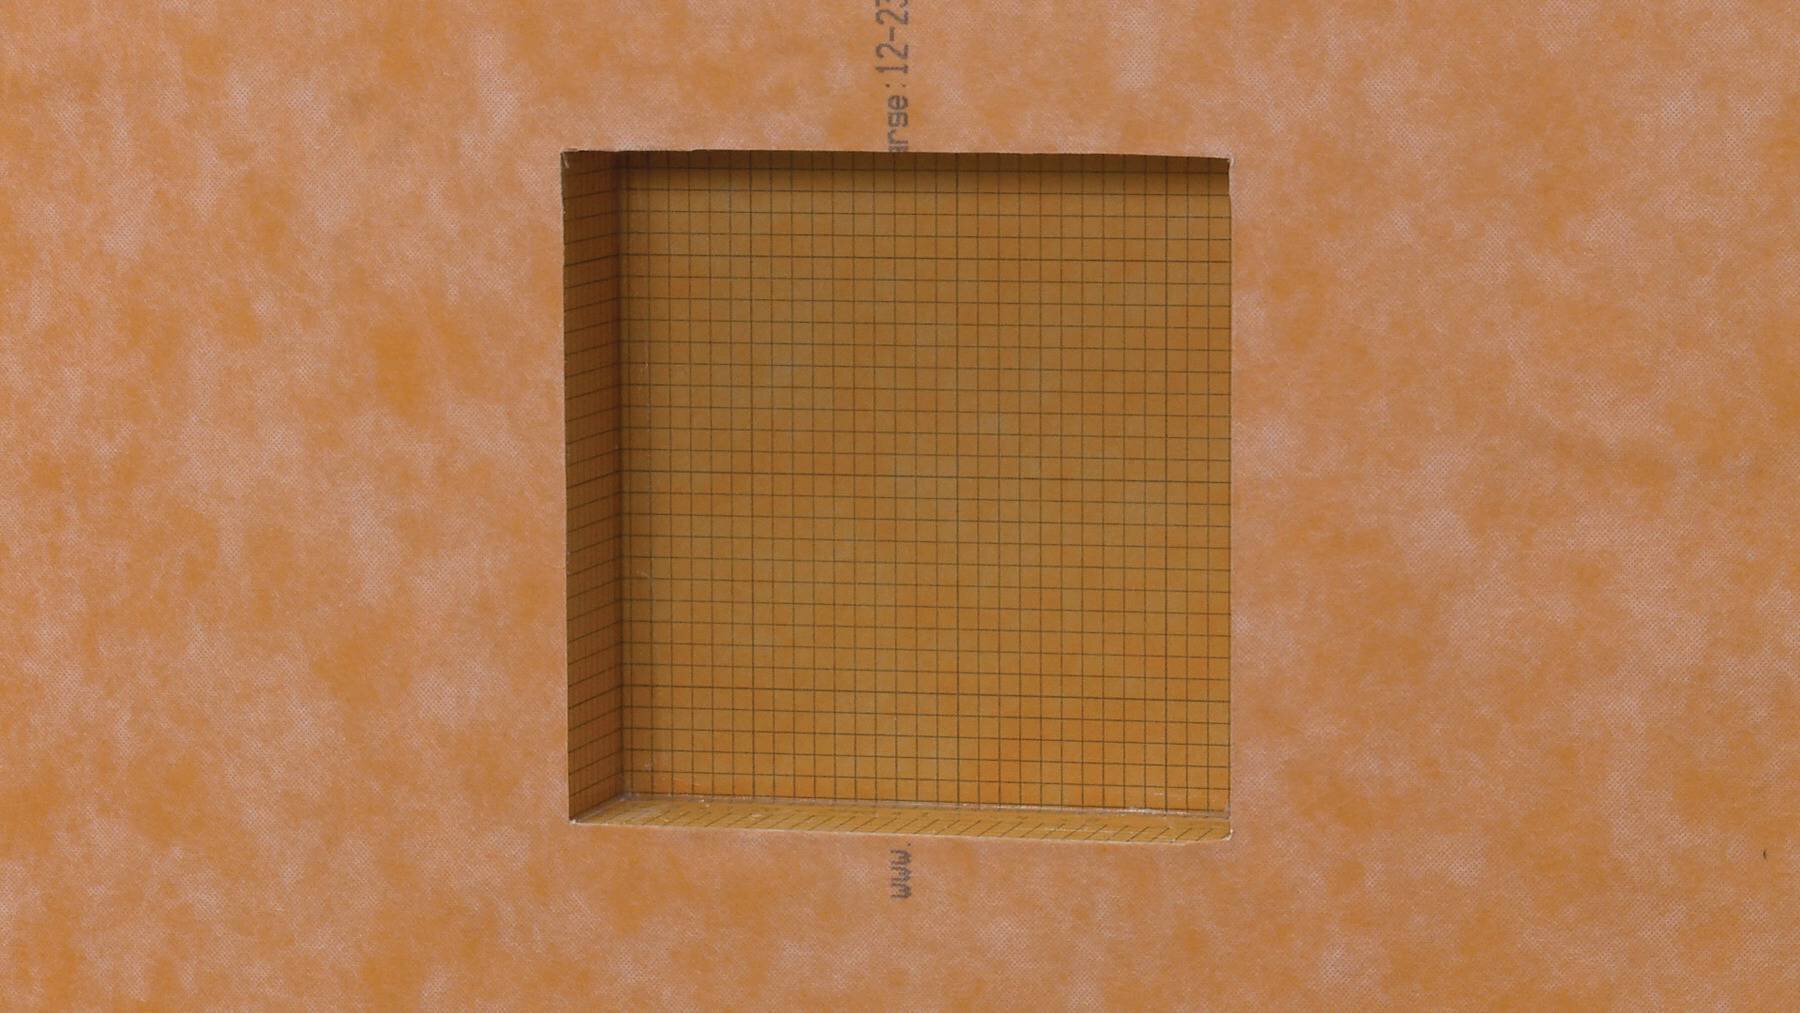
Connections between the niche and walls are made using the KERDI membrane, applied with Schluter SET®, ALL-SET®, FAST-SET®, or unmodified thin-set mortar (mixed to a fairly fluid consistency, yet still able to hold a notch). Apply the thin-set mortar using a 1/4" x 3/16" (6 mm x 5 mm) V-notched trowel or the Schluter®-KERDI-TROWEL, which features a 1/8" x 1/8" (3 mm x 3 mm) square notched design. Apply the membrane over the wall and embed into the mortar throughout its entire surface to ensure proper adhesion. Remove any air pockets. Cut the membrane to match the niche opening.
Download Schluter®-KERDI-BOARD-SN Installation
Product page
