Installation instructions for Schluter®-DESIGN-NICHE
How to install the DESIGN-NICHE aluminum shower niche
These instructions outline the steps for installing DESIGN-NICHE. Follow each section carefully to ensure the niche is positioned, secured, and waterproofed correctly.
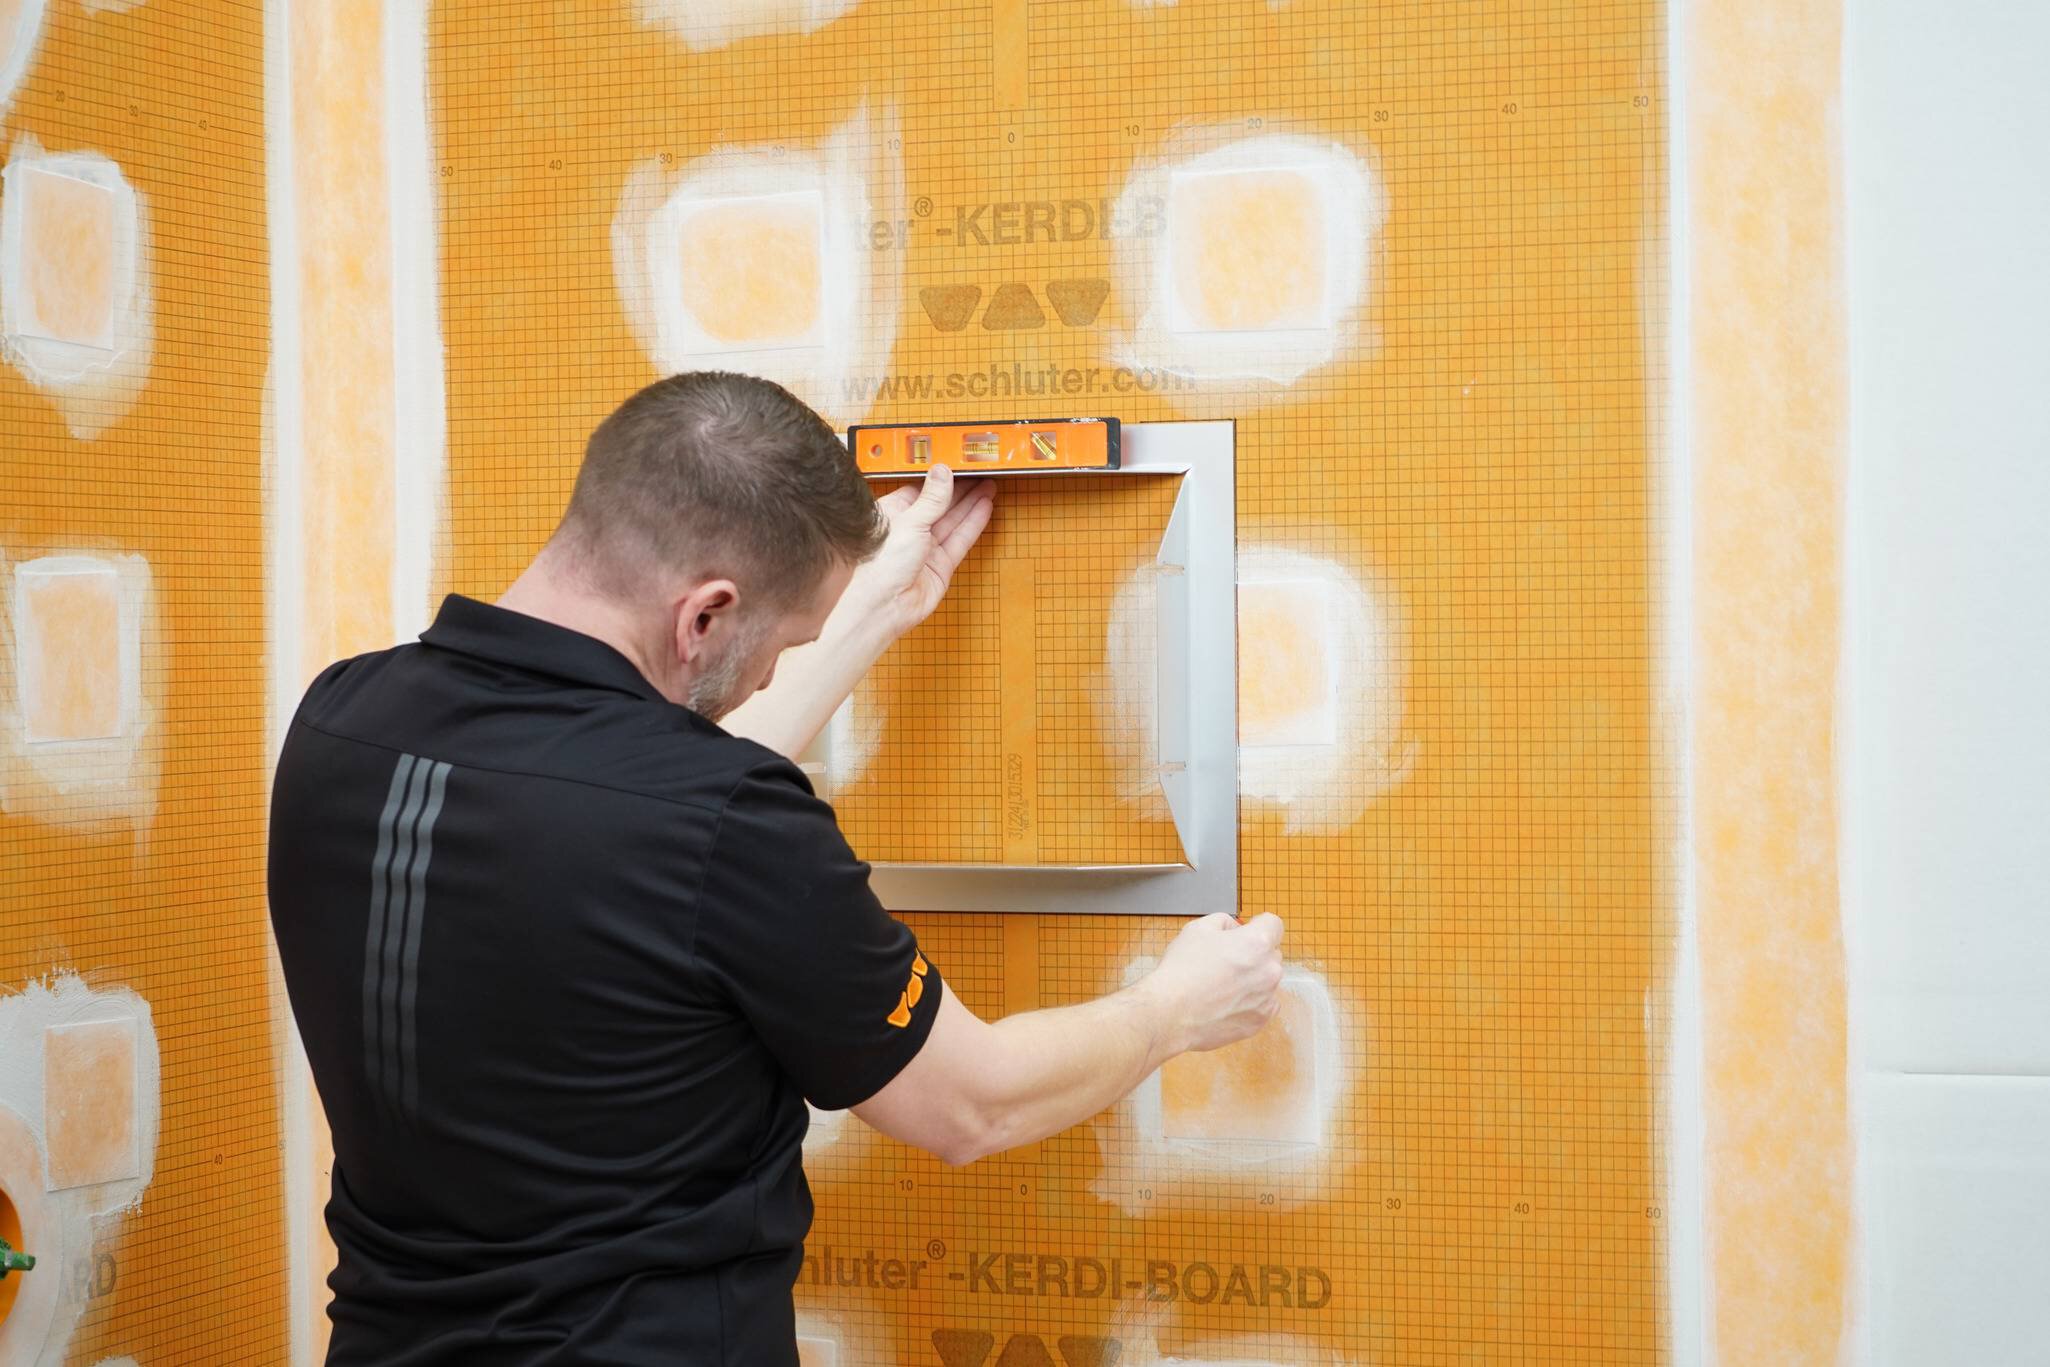
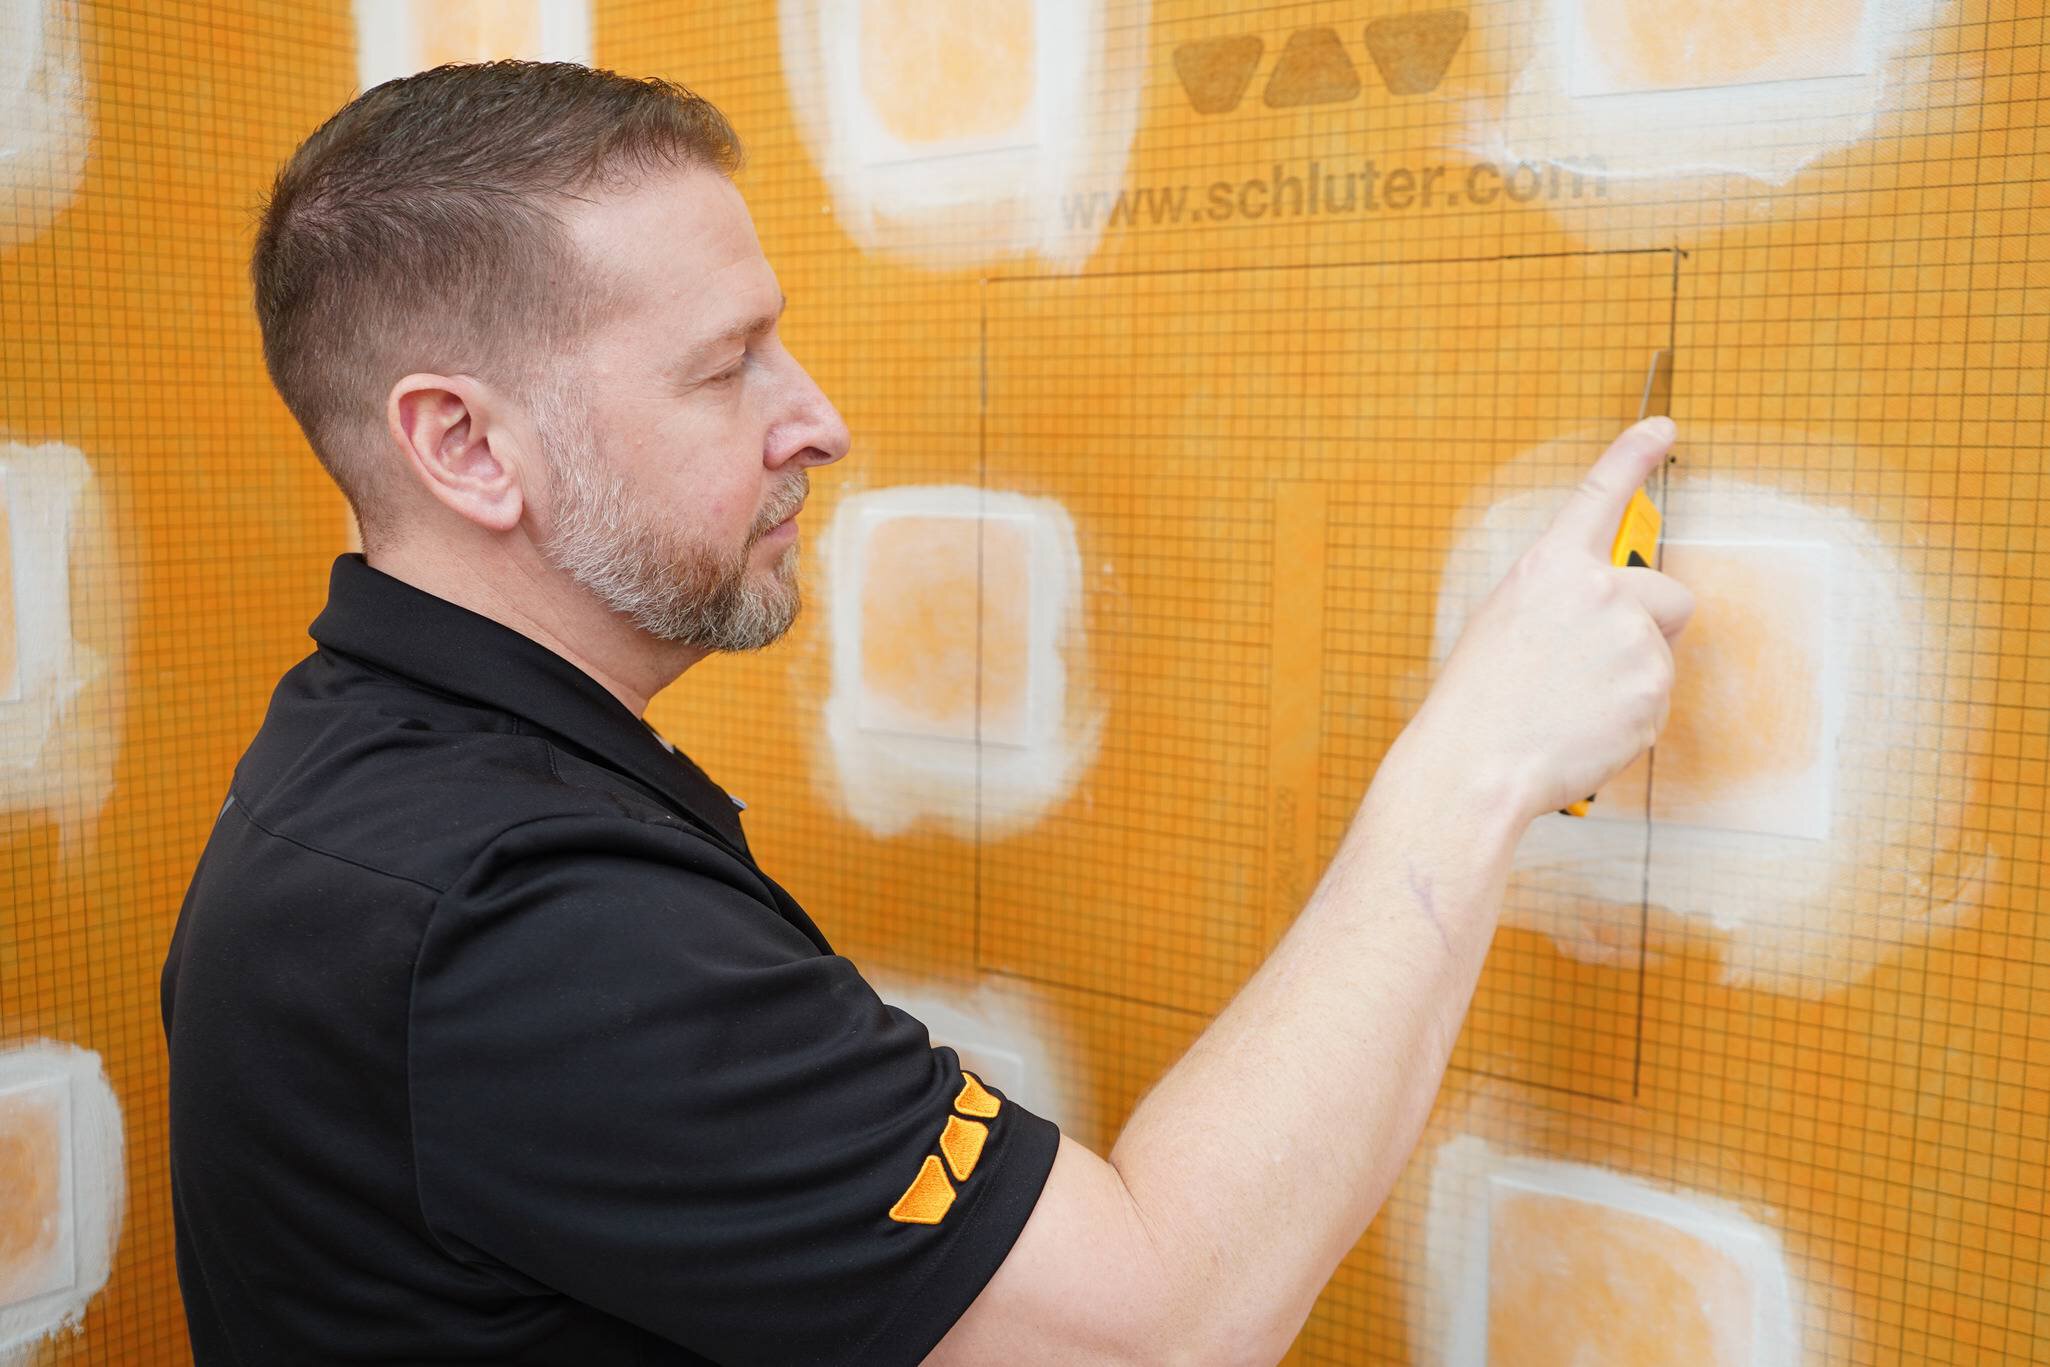
Using the outer edge of the niche frame as a guide, locate, measure, and mark the desired location for the niche on the wall. Use a level to confirm proper orientation, then cut the hole for the niche and remove any excess material.
Note: Punctures in the underlying KERDI-BOARD or KERDI-MEMBRANE within 2” (50 mm) of the opening cut for the niche should be patched. Patch should cover up to the opening for the niche and 2” (50 mm) in all other directions.
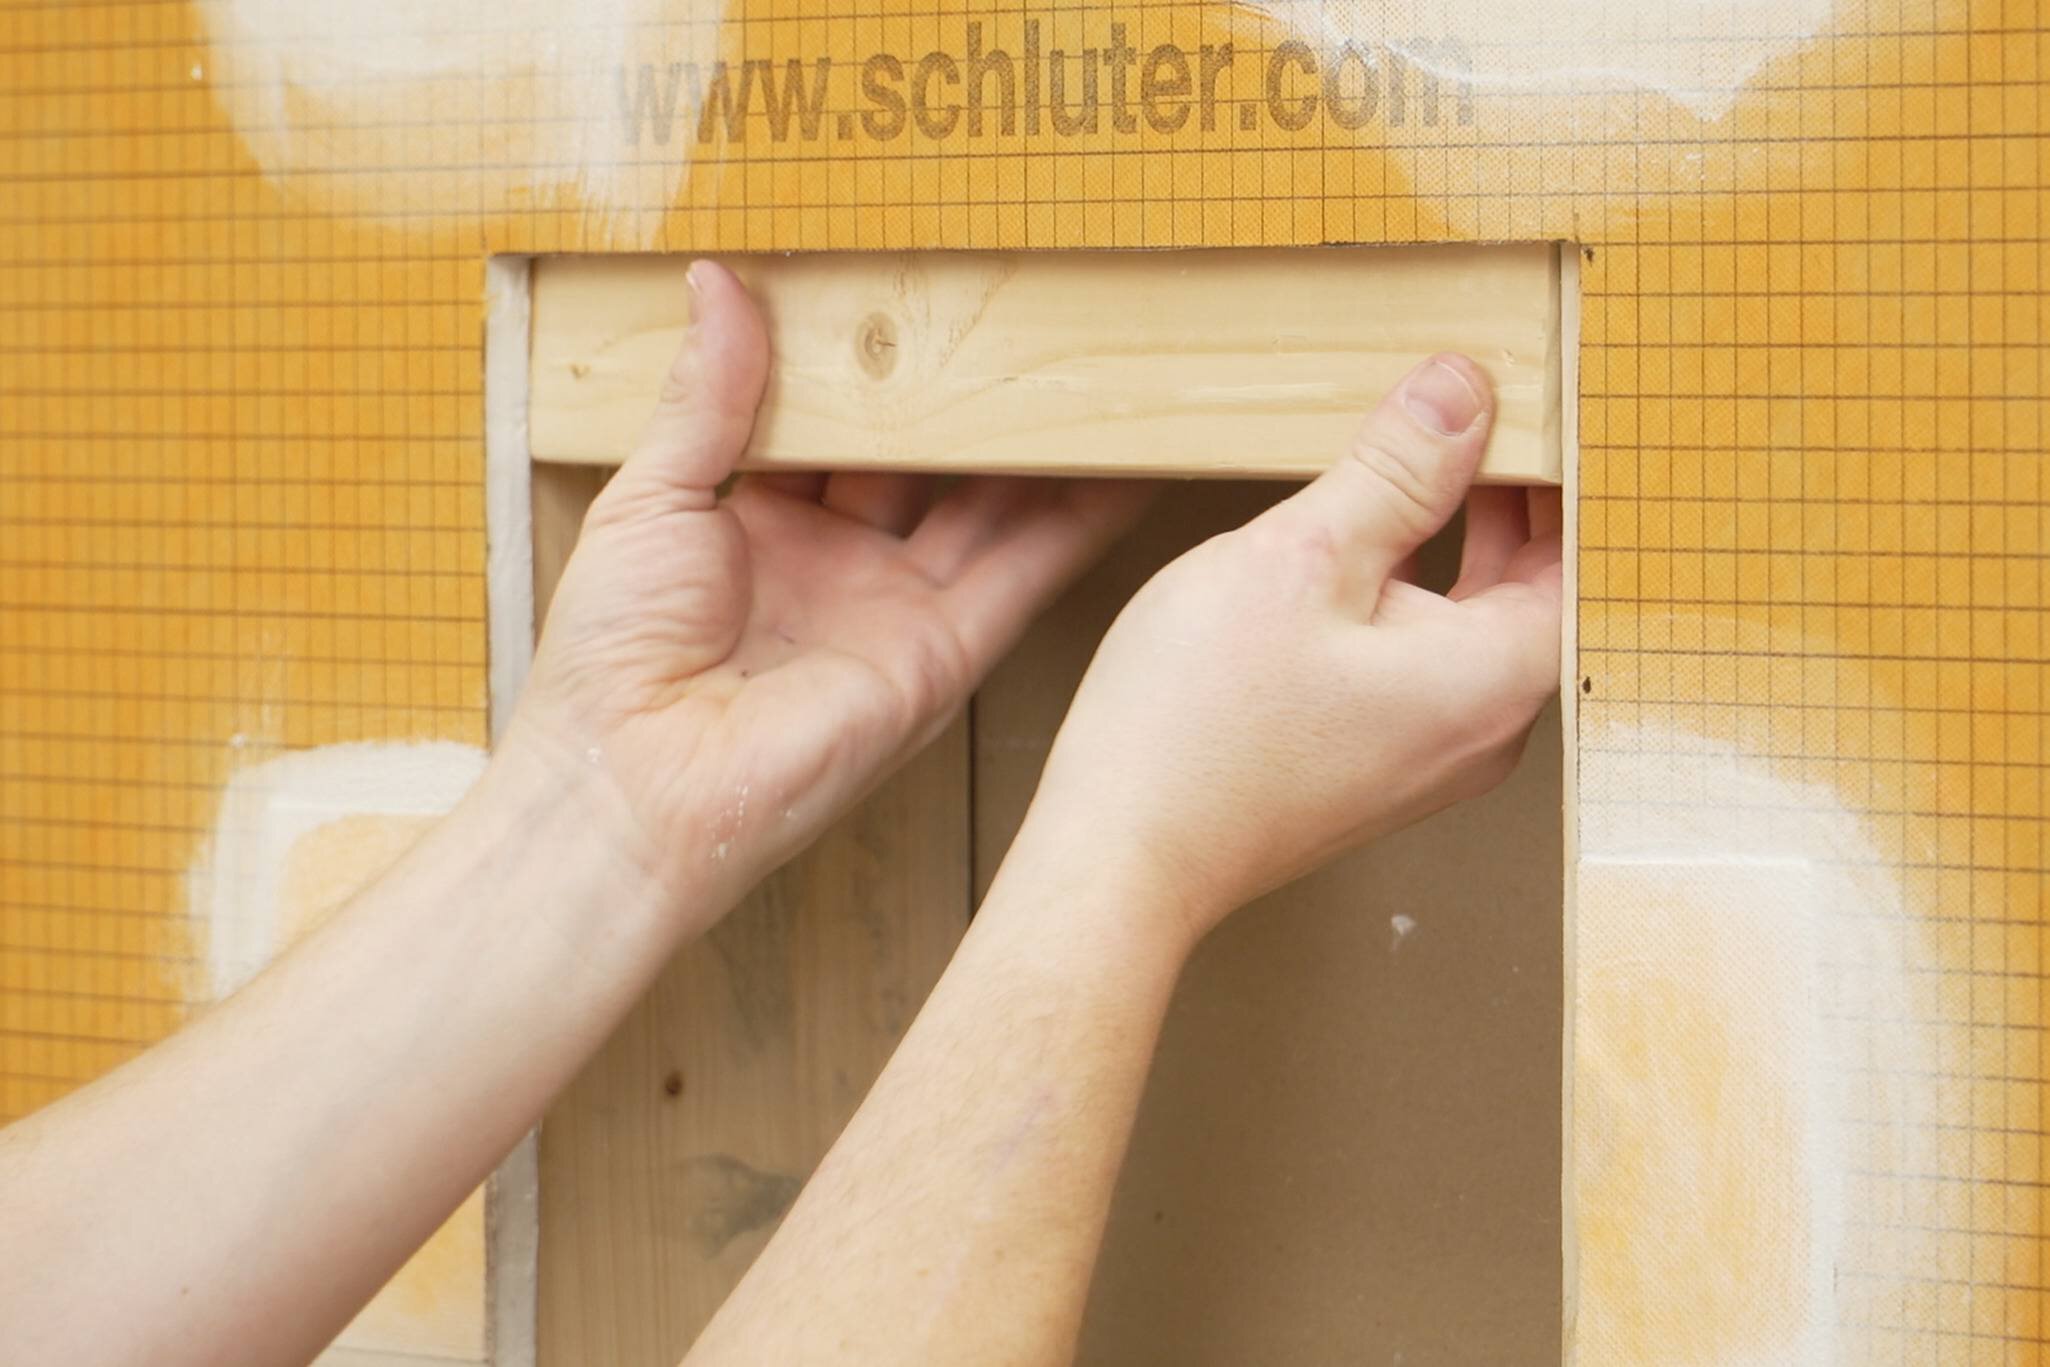
The flange of the anodized aluminum frame must be supported and bonded on all sides. Add support (blocking) behind all sides of the frame. Supports can be plywood or 2" x 4" and installed before or after KERDI-BOARD. The foam spacers provided ensure proper clearance for the knurled adjustment nuts.
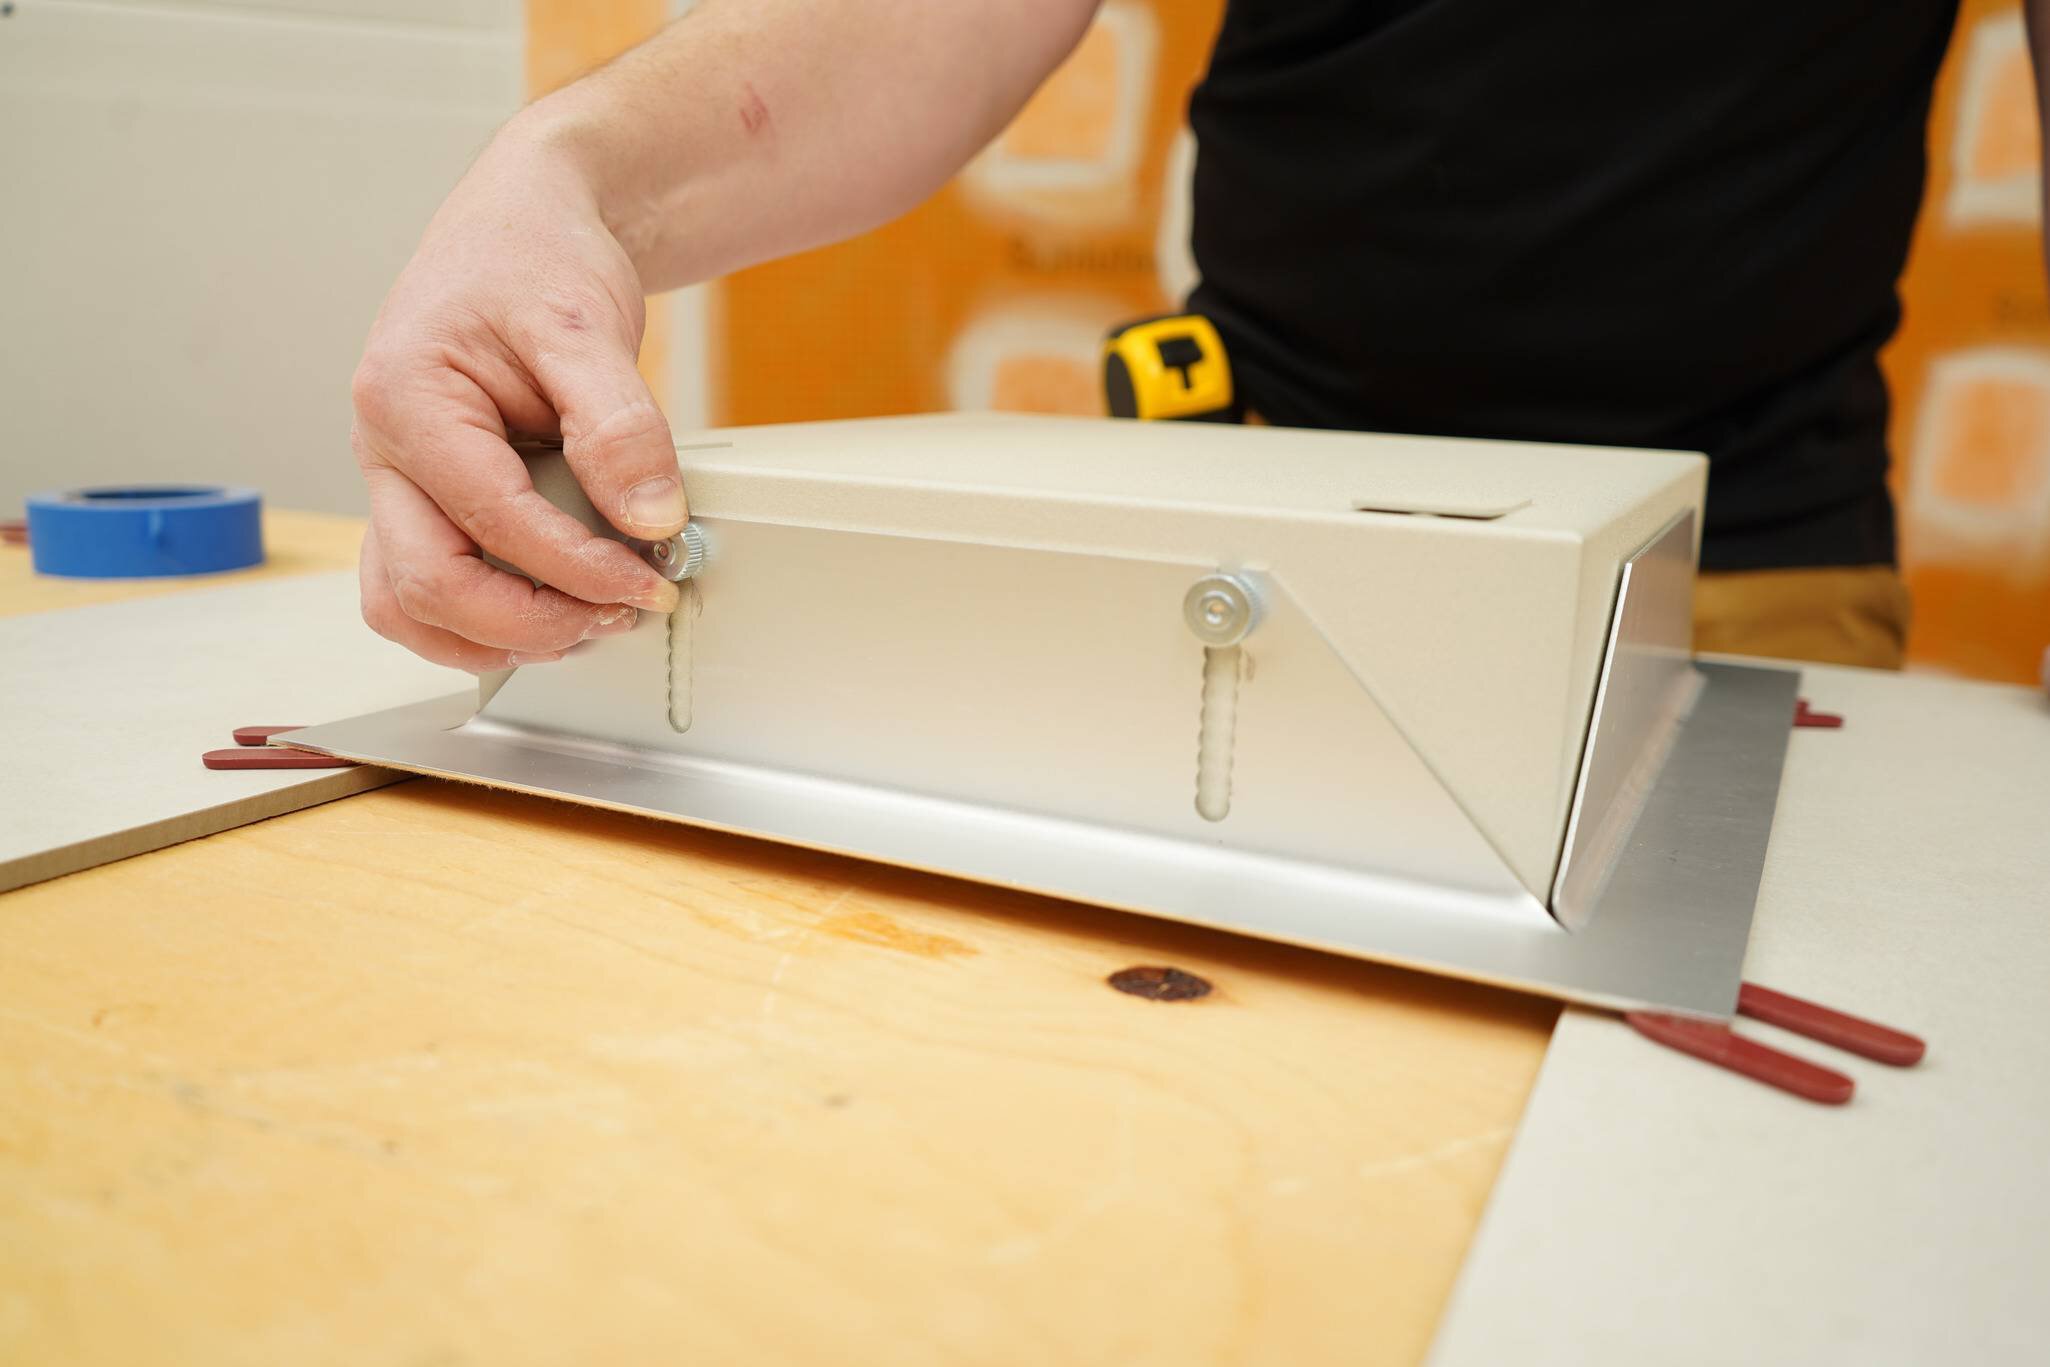
Adjust the niche to the desired depth. For a flush installation, account for the tile and setting material thicknesses.
For a reveal edge (protruding) choose the desired depth (minimum of 1/8" (3mm) - maximum of 2-3/16" (55mm).
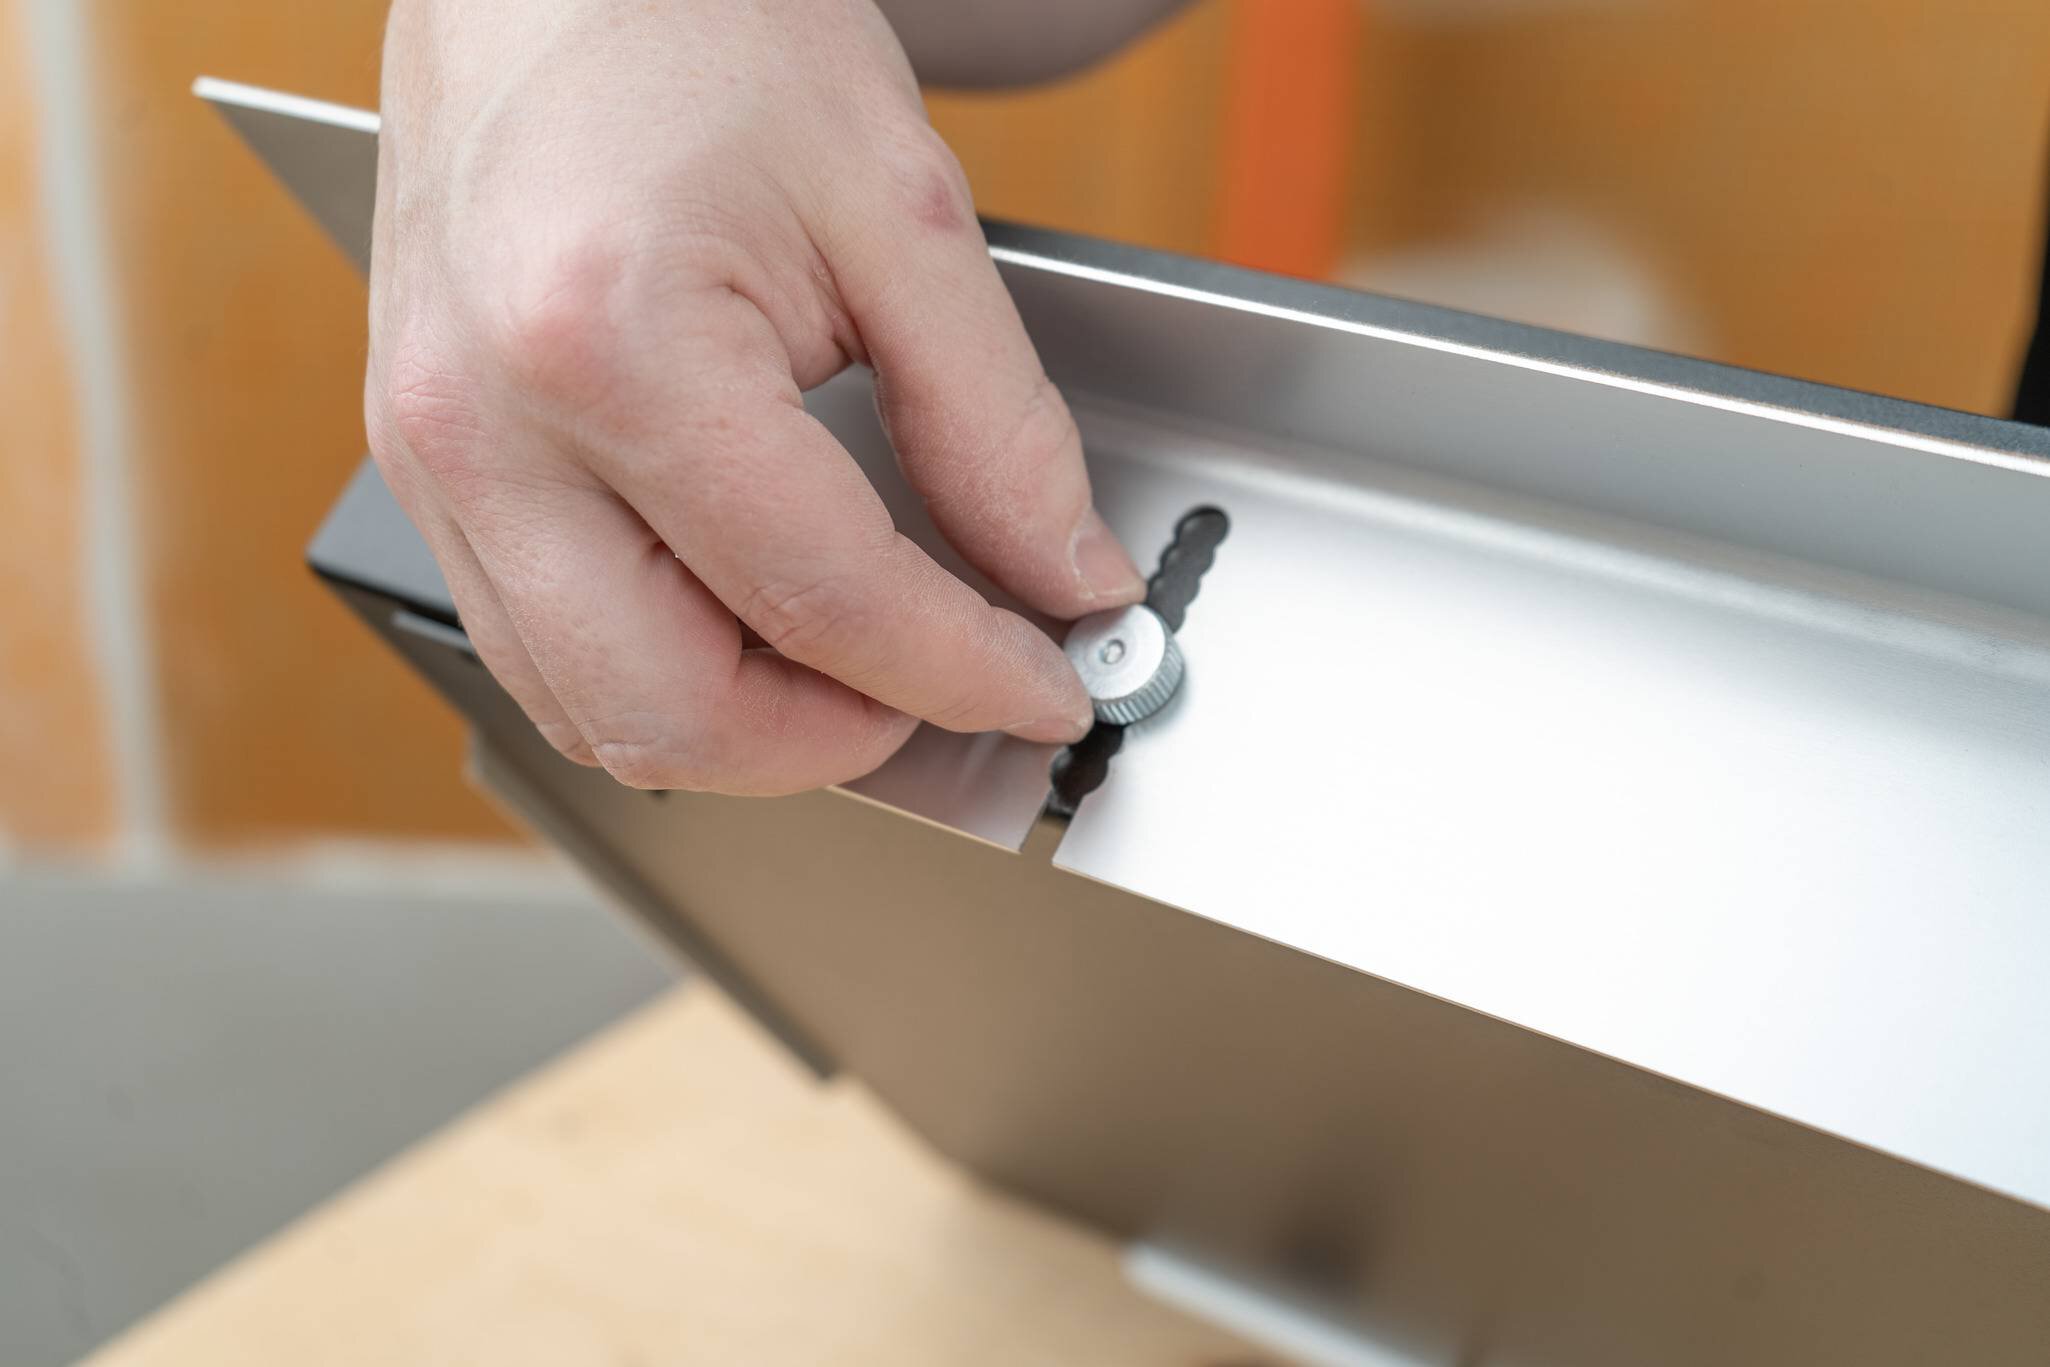
Hand-tighten the knurled nuts on the frame to set the depth of the niche body. The flat side of the nut picks any depth, and the raised side fits into the circular cut-outs, such that each cut-out adds 3/16" (5 mm).
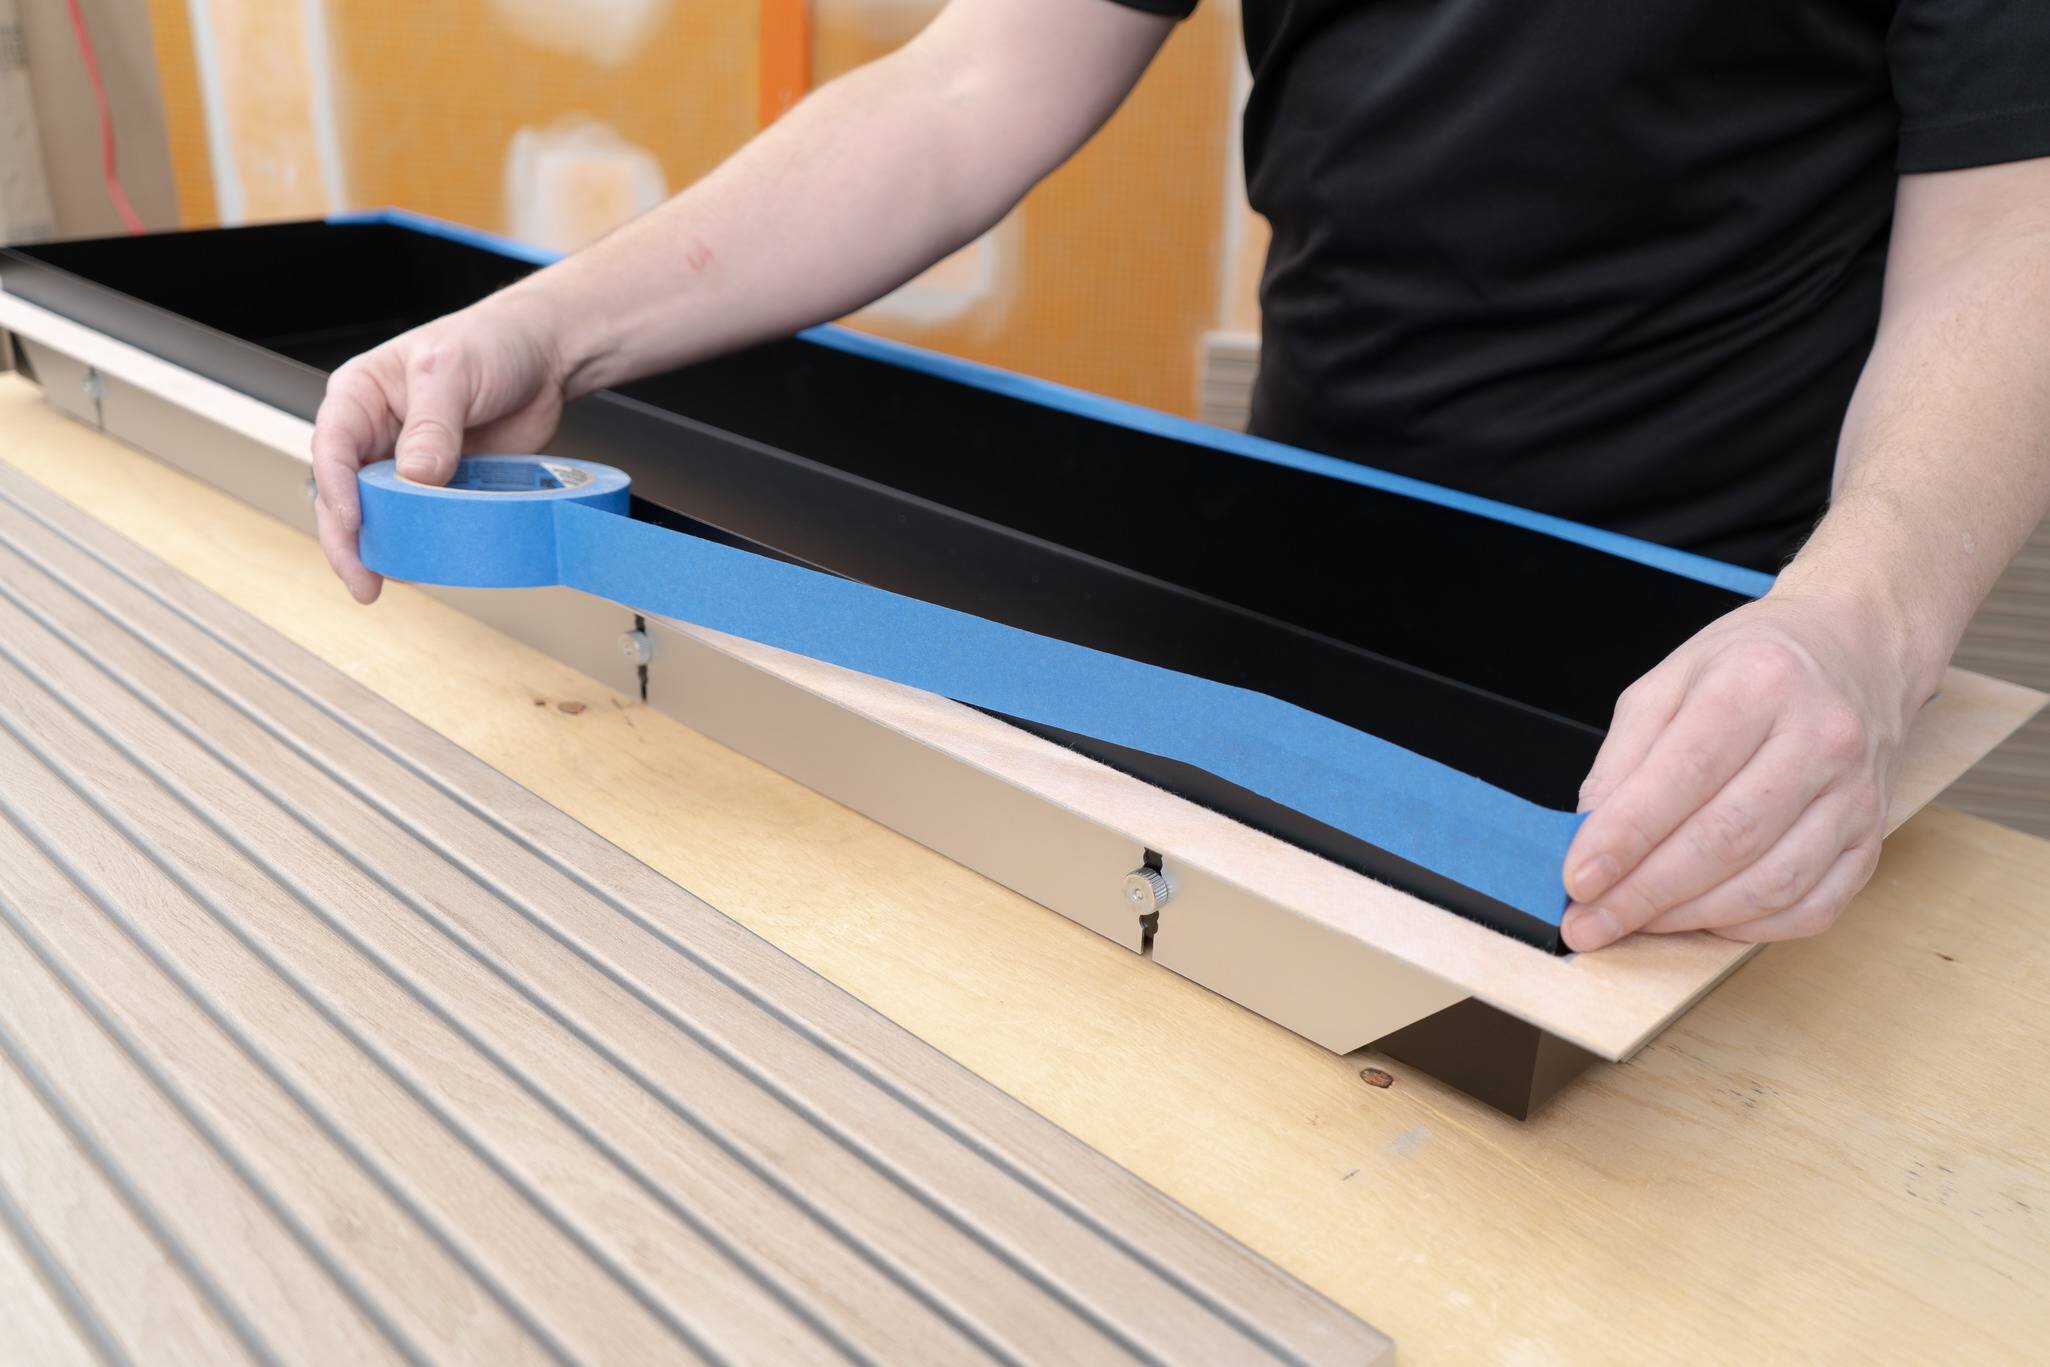
Note: Use a mild adhesive tape, such as painter’s tape, to protect the visible surface if the niche is protruding.
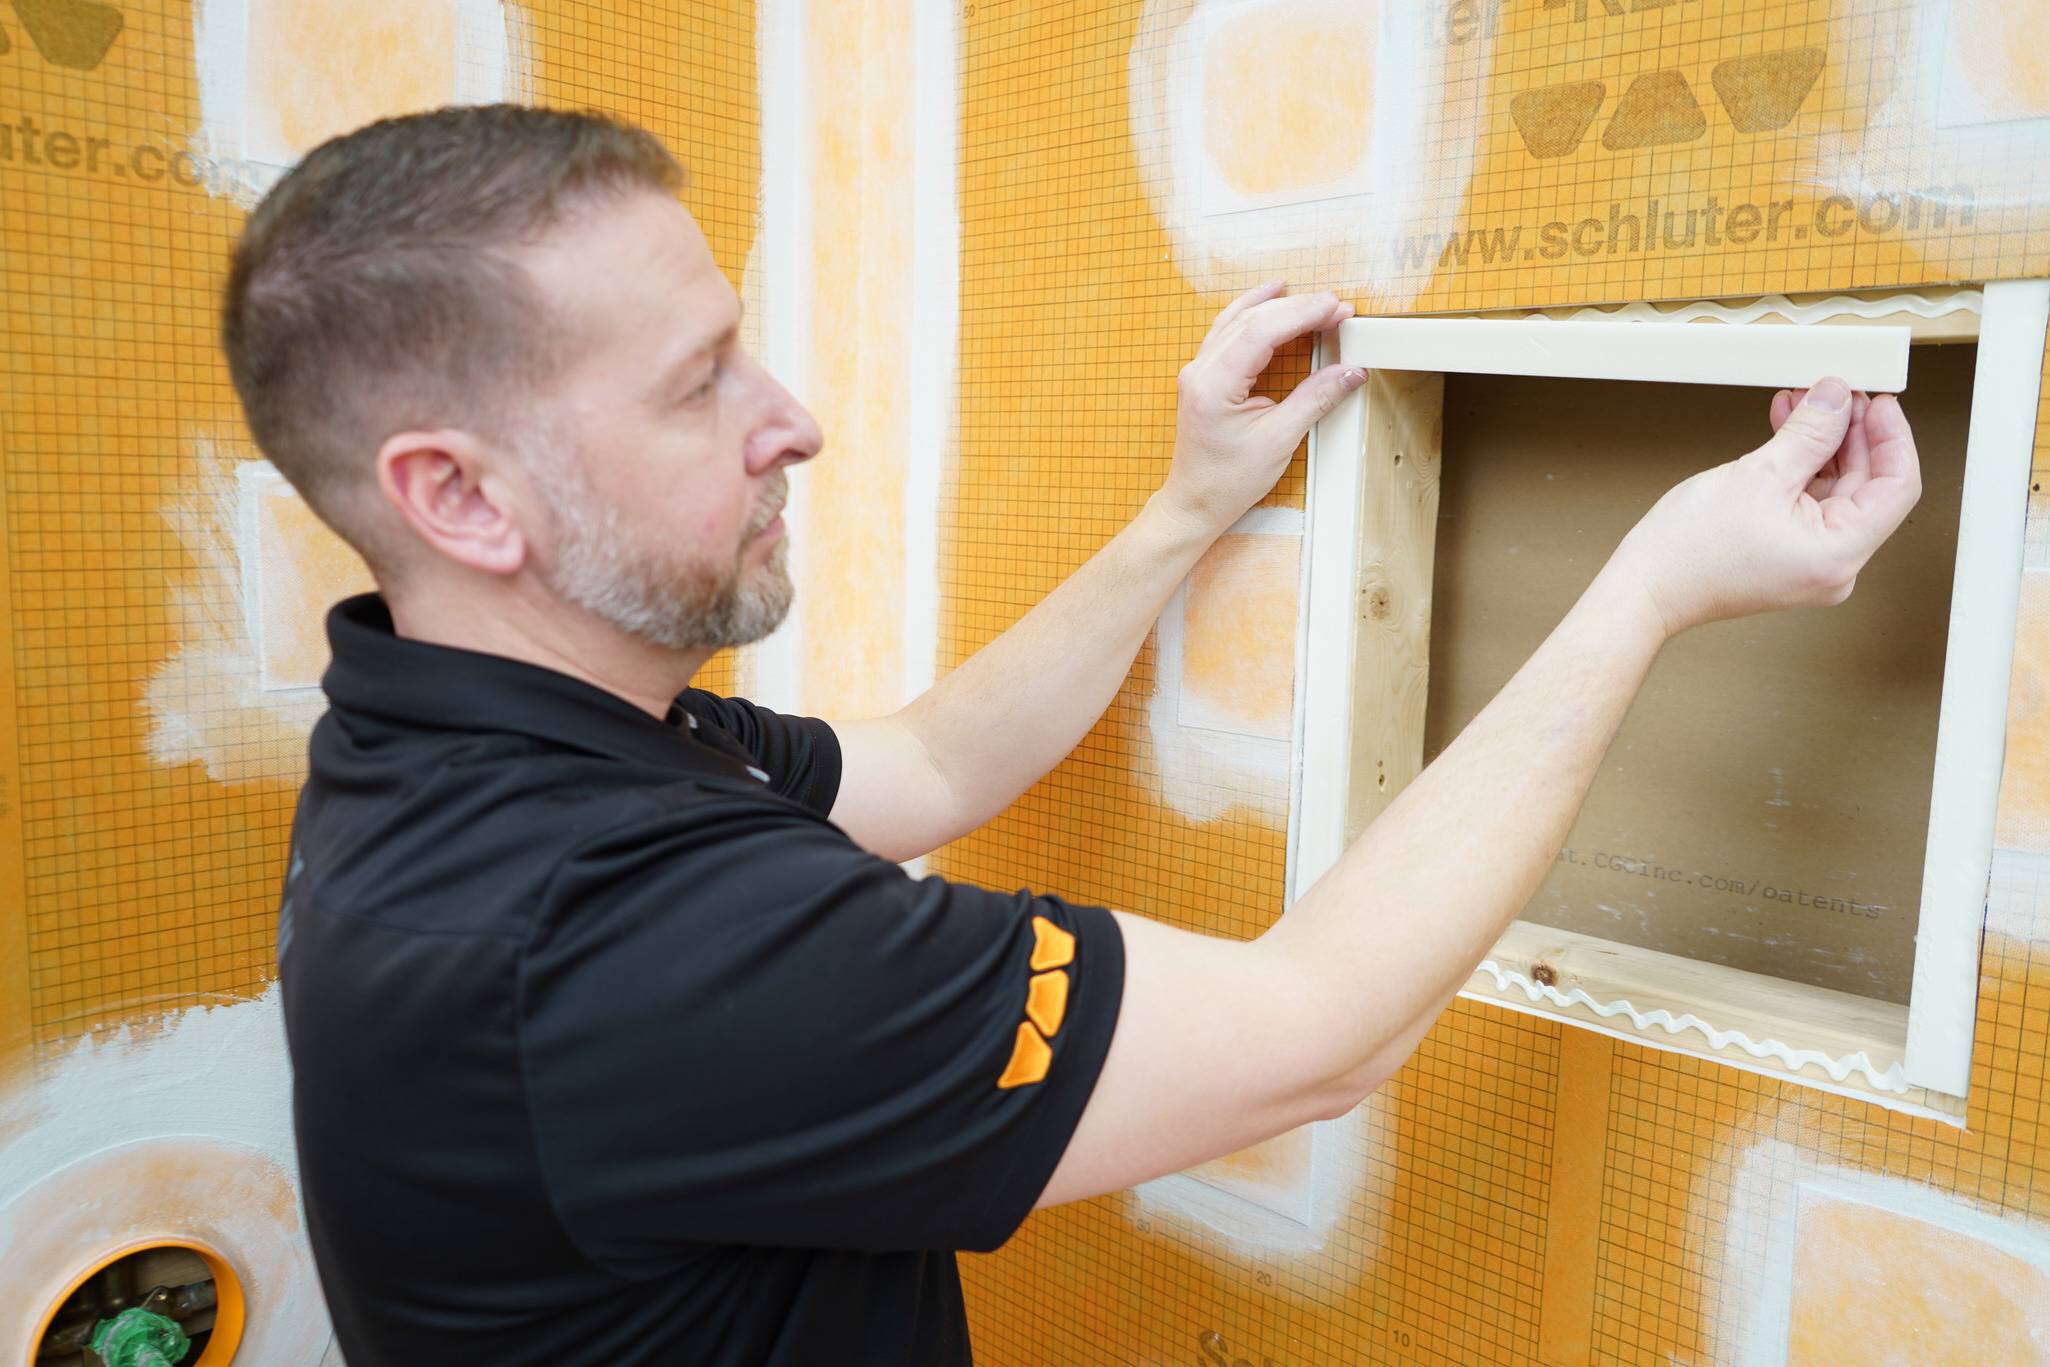
Using KERDI-FIX, adhere the foam spacers to the blocking and the frame to the spacers, then press firmly into place.
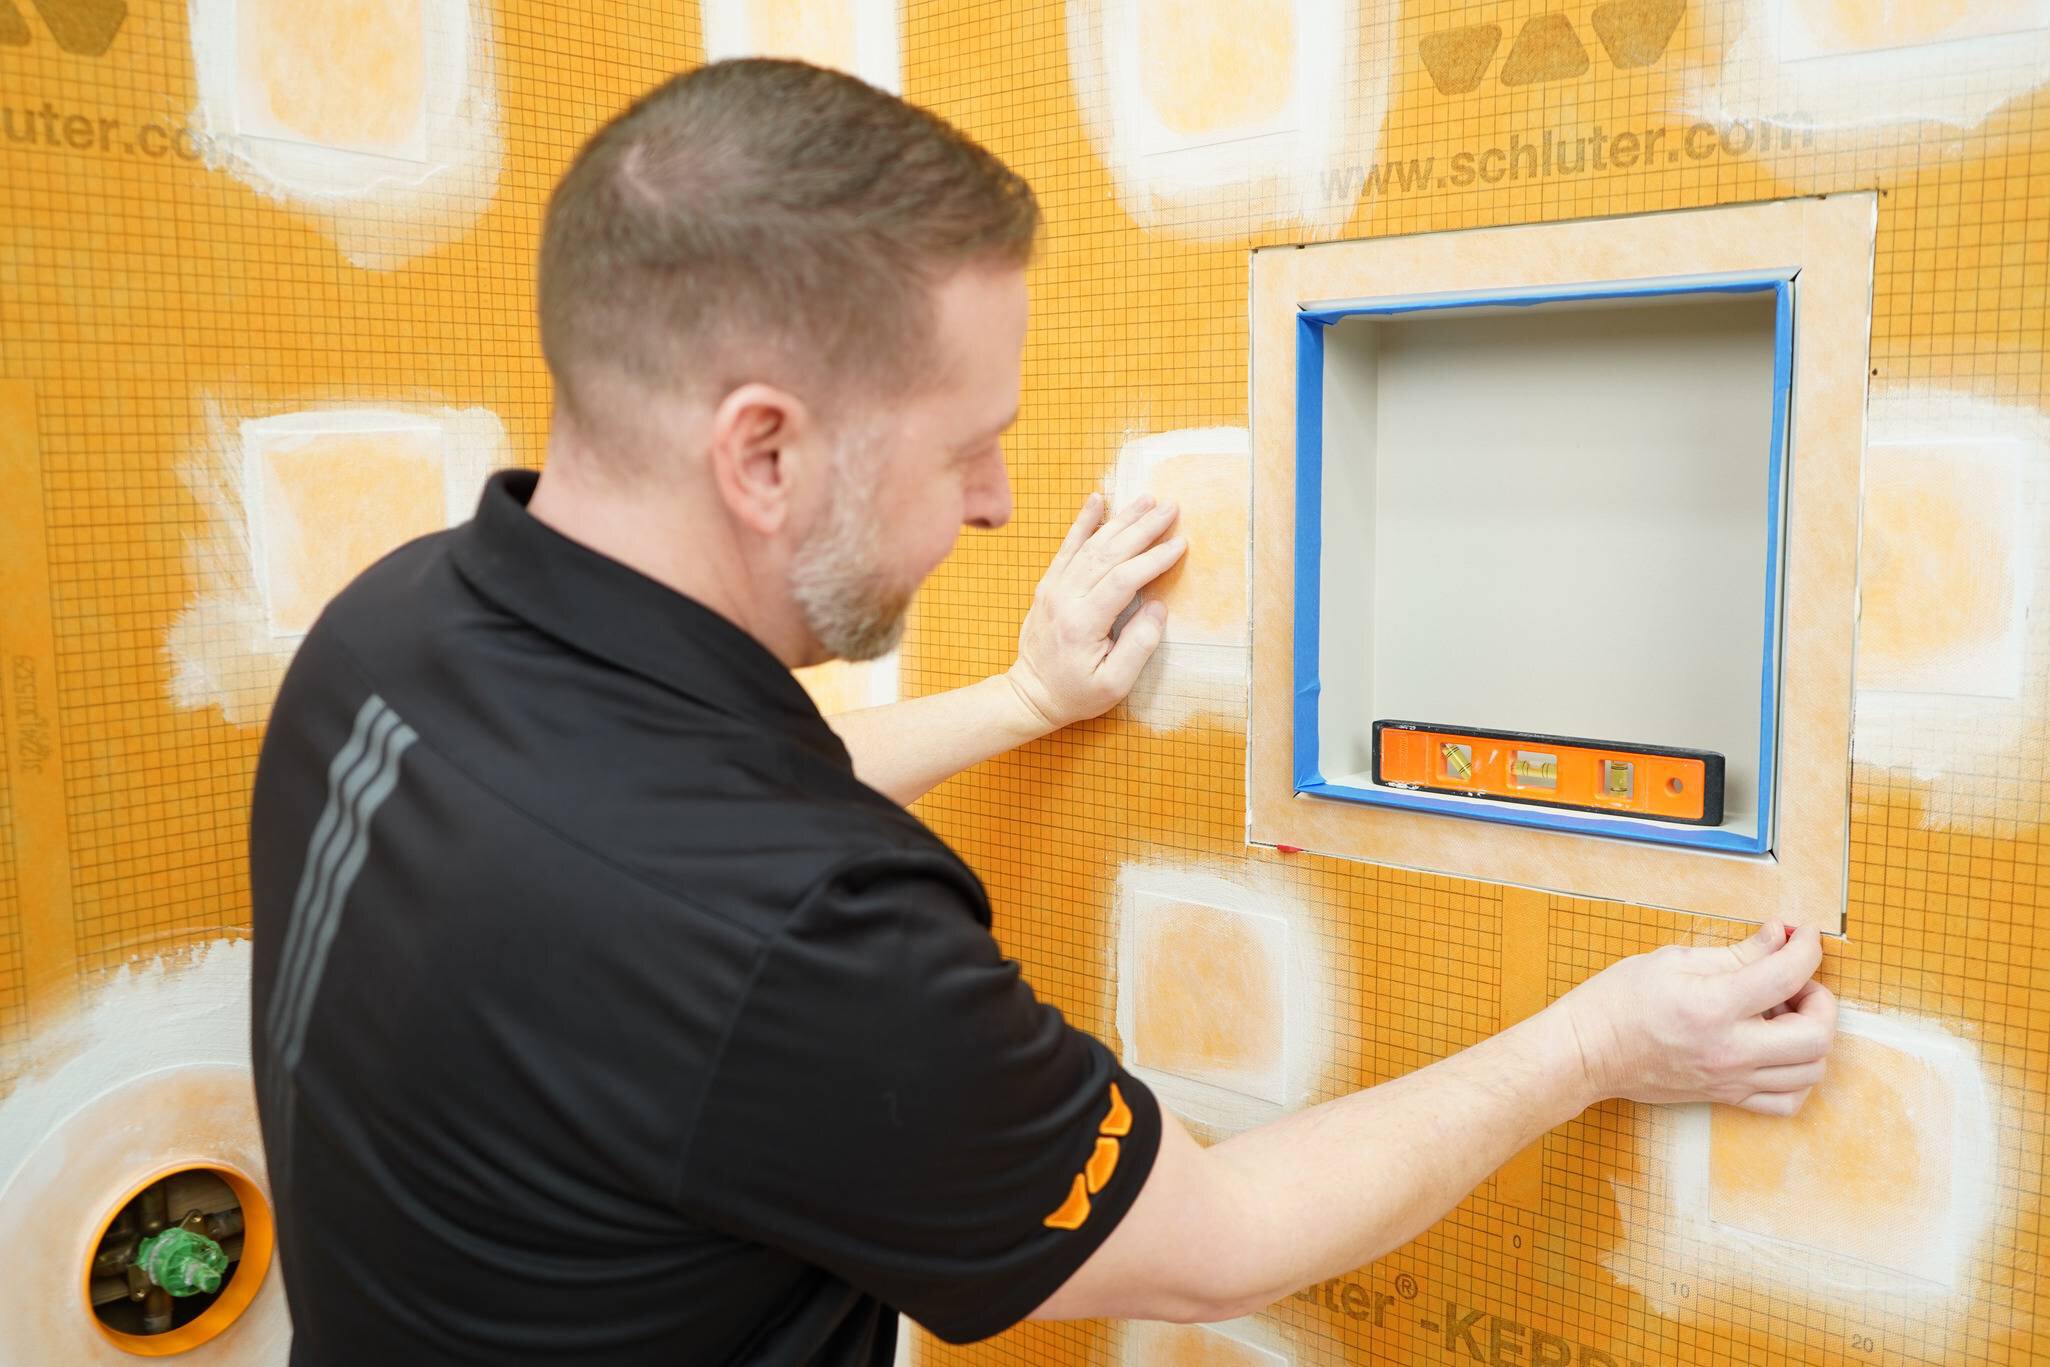
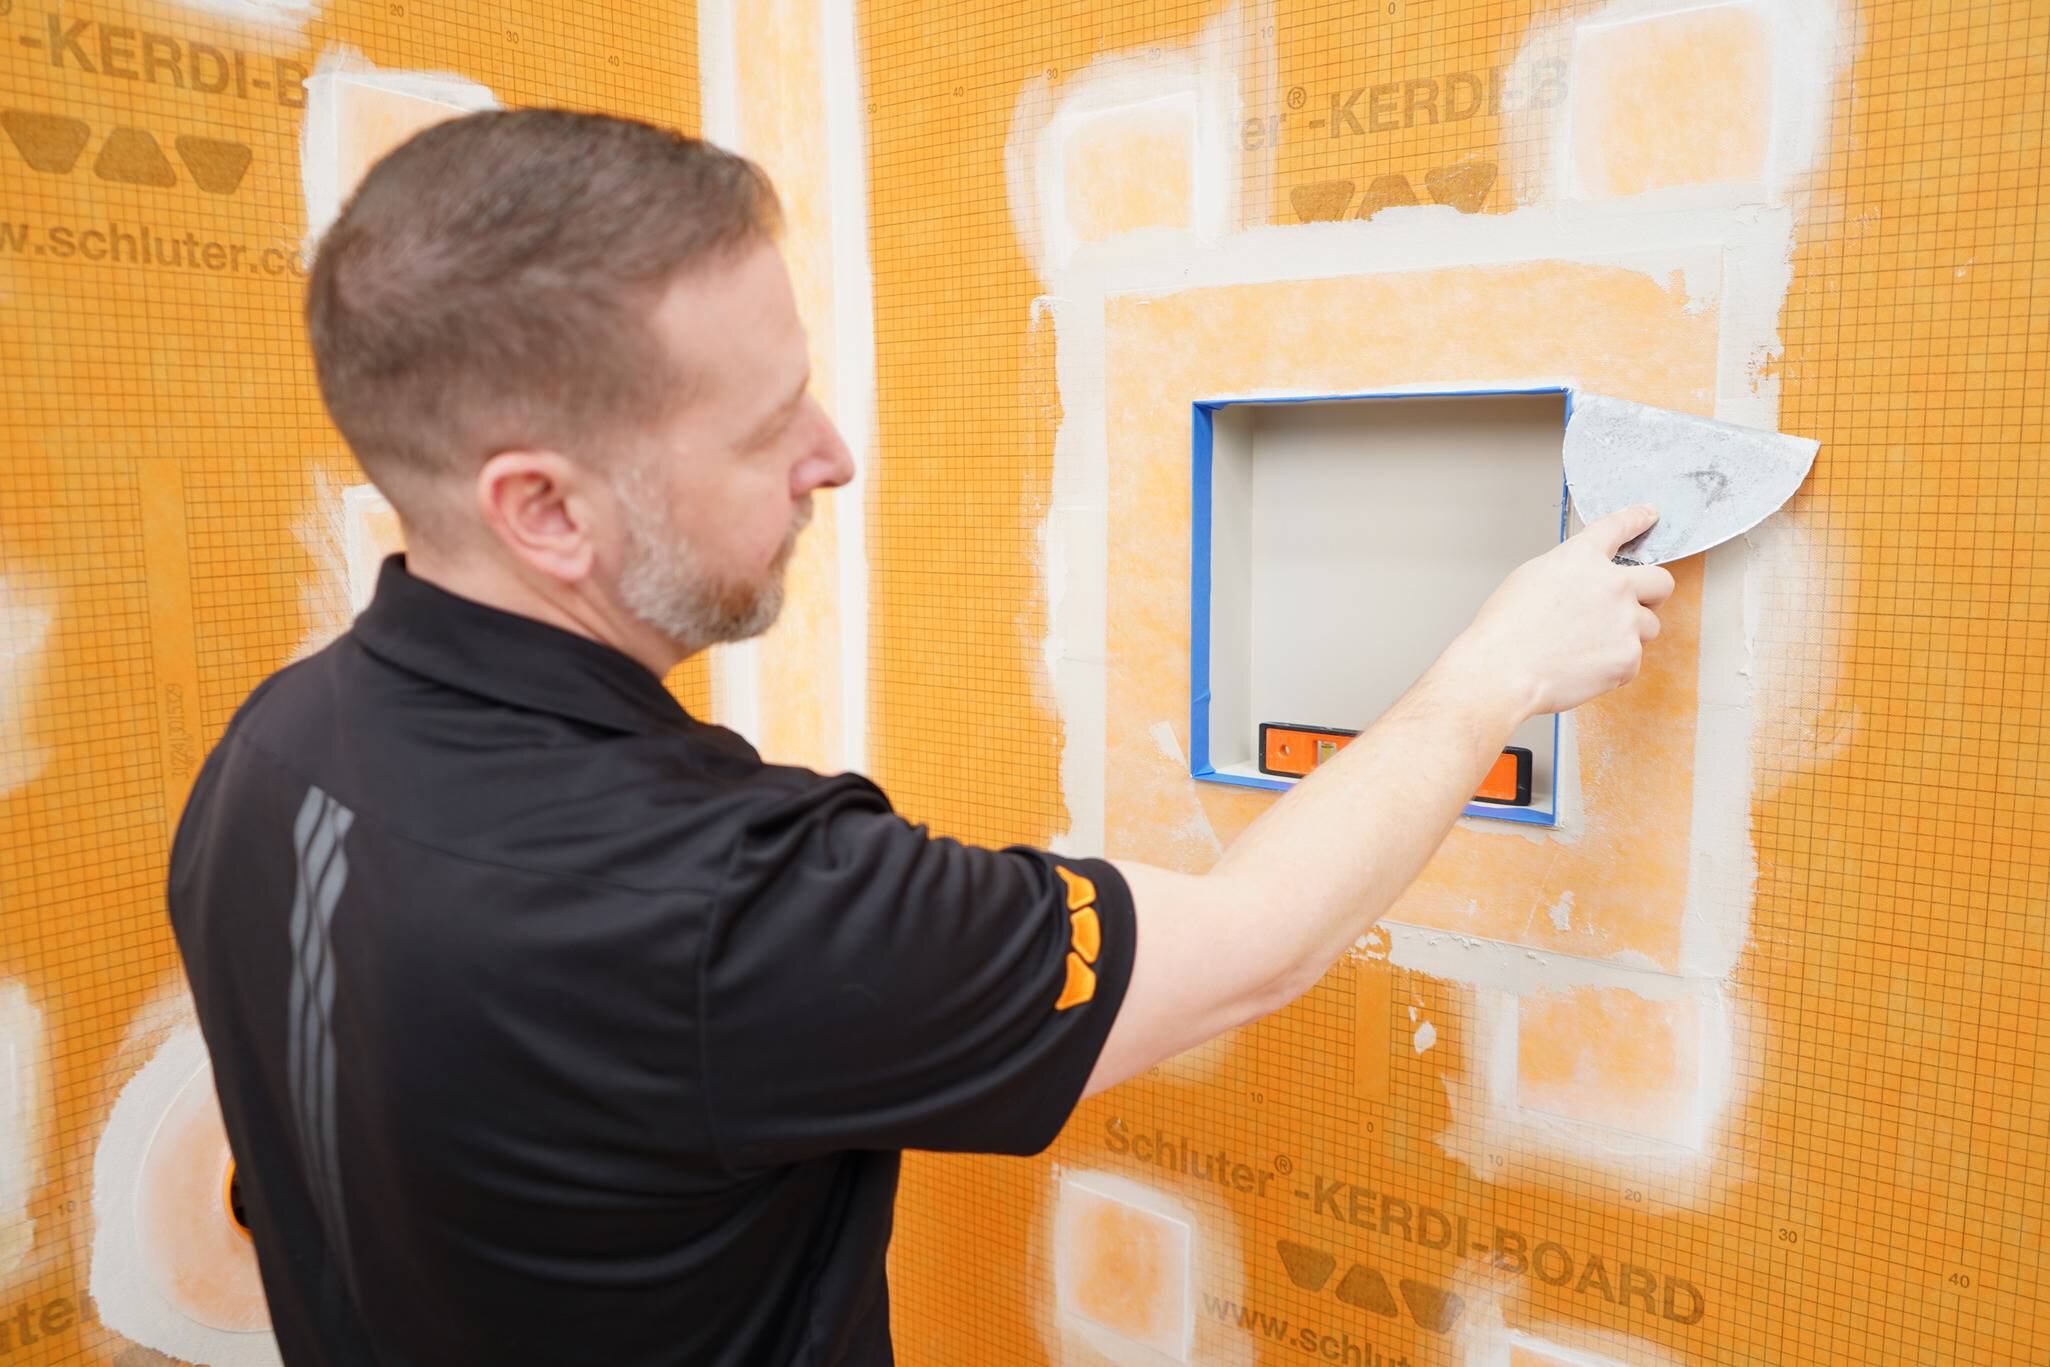
While the KERDI-FIX is curing, check that the niche is level.
Spacers or shims can be inserted in the gap between the flange edge and the KERDI-BOARD to correct misalignment.
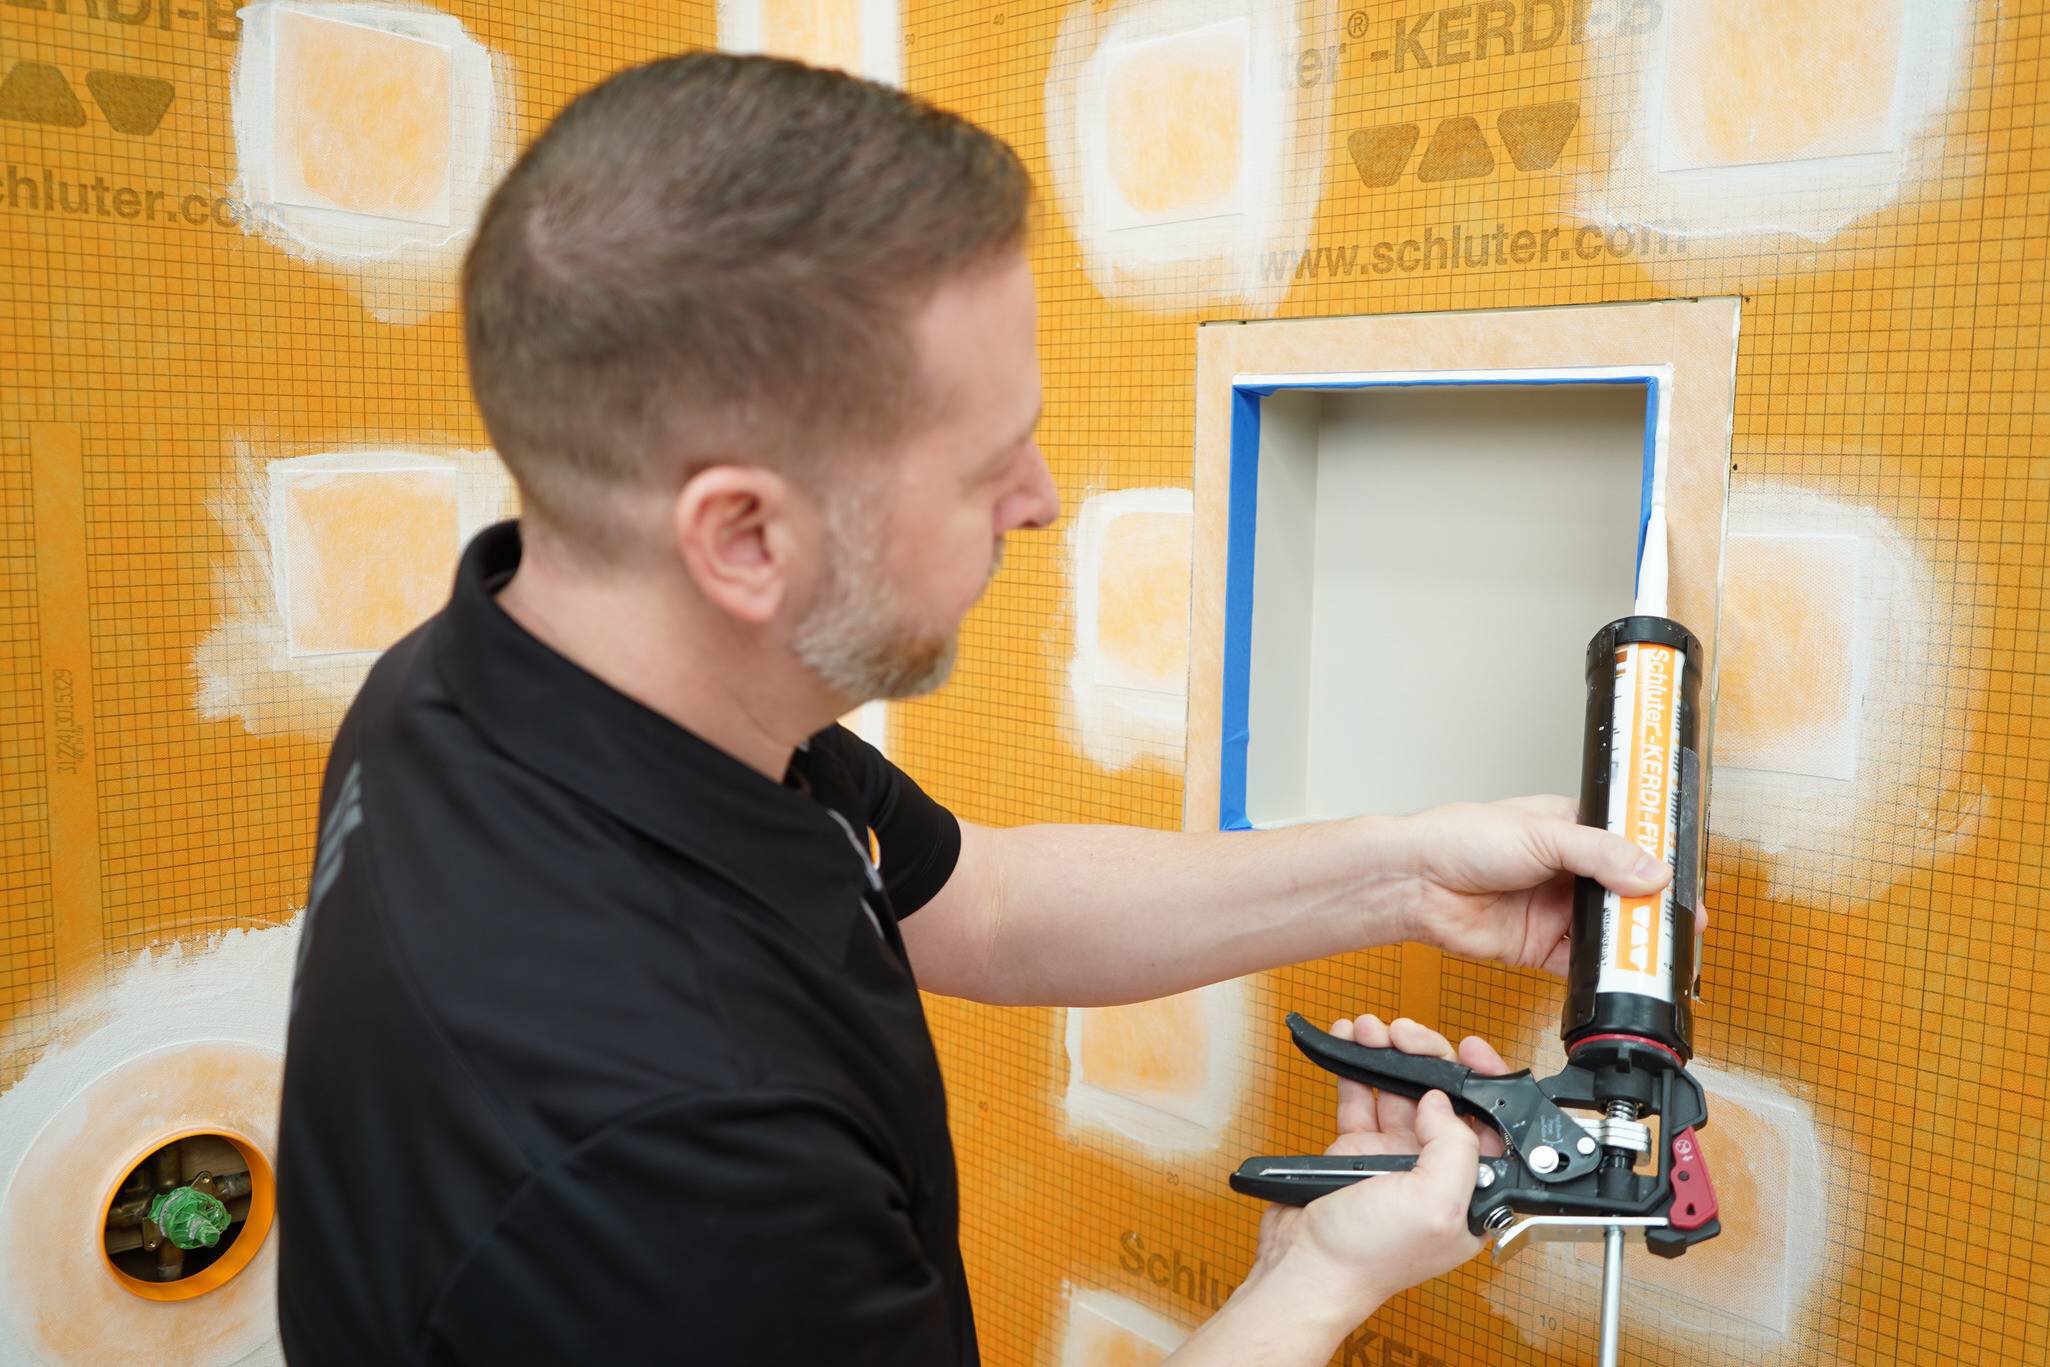
Completely seal the gap between the frame and the body of the niche using KERDI-FIX.
The surface where KERDI-FIX is to be applied must be clean and free of grease or other contaminants.
Pay special attention to ensure the relief cuts at the frame corners are filled and covered. Once applied use an appropriate tool to smooth the bead of KERDI-FIX.
Apply Schluter SET®, ALL-SET®, FAST-SET®, or unmodified thin-set mortar to the area and comb with a KERDI-TROWEL.
Embed the KERDI-BAND frame around the niche, then tile the surrounding area per standard methods.
