Schluter®-VINPRO-STEP-R
Resilient surface finishing profile for stairs with elongated reveal for increased visibility

- Protects the edges of resilient surface coverings from damage
- Increases safety by improving the visibility of stair edges
- Ideal for residential and light commercial use
- Available in anodized aluminum in three finish colors


Find recommended accessories here

Profile Estimator
Discover what you need for tile protection and easy transitions.
Schluter®-VINPRO-STEP-R is a finishing and edging profile for resilient covering (e.g., LVT) installations on stairs. The top of the profile features a capping flange with a rounded leading edge, while the elongated vertical section provides increased visibility. VINPRO-STEP-R features a tapered anchoring leg, with unique holes spaced evenly along the length of the profile for use with fasteners. The anchoring leg can also be bonded to the substrate using adhesive such as Schluter-KERDI-FIX. The profile features a 7/16" (11 mm) wide sloped top flange to hide the cut edge of the resilient floor covering, providing a finished look.
Schluter resilient surface covering profiles require no special maintenance or care and are resistant to mold and fungi. Clean profiles using neutral cleaning agents. For anodized aluminum, do not use abrasive or strong alkaline cleaning agents.
1. Select the profile according to resilient covering thickness. It is recommended to choose a profile height up to a 0.5 mm greater than the covering thickness.
2. Place the profile in its desired position and mark the edges of the profile onto the substrate.
3.a. Adhesive Installation
3.a. Instalación del adhesivo Aplique Schluter®-KERDI-FIX o un adhesivo equivalente en la parte trasera del ala de fijación, según las instrucciones de instalación del fabricante. Presionar el ala de fijación sobre el substrato y alinearla en la posición deseada. Asegúrese de retirar rápidamente cualquier exceso de adhesivo.
3.b. Fastened Installation
b. Instalación con fijaciones: alinee el perfil en la posición deseada y fíjelo al substrato a través de los orificios del ala de fijación. Tornillo recomendado: Tornillos de cabeza plana #6 / M3.5, longitud mínima - 3/4"(19 mm). Asegúrese de instalar los tornillos de forma que la cabeza del tornillo quede a ras de la superficie del ala de fijación, evitando que traspase a la superficie acabada.
Para substratos de hormigón: se recomienda el uso de anclajes. En primer lugar, coloque el perfil en la posición deseada y marque los orificios en el substrato. A continuación, taladre orificios guía en los lugares marcados e instale los anclajes siguiendo las instrucciones del fabricante. Asegúrese antes de la instalación de que el tamaño del anclaje es adecuado para el elemento de fijación seleccionado.
4. De ser necesario, puede utilizarse un compuesto de parcheado/nivelación para eliminar las irregularidades del piso y del ala de fijación. Consulte las instrucciones de instalación del fabricante del compuesto utilizado para nivelar.
5. Instale el revestimiento flexible siguiendo las instrucciones de instalación del fabricante, con la separación de bordes recomendada. Asegúrese de cortar adecuadamente el revestimiento adyacente para que encaje en la cavidad del perfil.
6. Cuando instale con adhesivos o materiales de lechada, elimine rápidamente cualquier residuo de la superficie visible del perfil.
FAQ
¿Están incluidos los tornillos con los perfiles VINPRO?
¿Se necesita un parche de nivelación para disipar gradualmente el ala de fijación y evitar que percuta a través de la superficie superior del piso vinílico?
¿En qué acabados están disponibles los perfiles VINPRO?
Los perfiles VINPRO están disponibles en cromo cepillado (ACGB), níquel cepillado (ATGB) y bronce antiguo cepillado (ABGB) ...
Read more¿Cómo puedo elegir la mejor altura de perfil para mi revestimiento flexible?
Recomendamos elegir una altura de perfil hasta 0,5 mm superior al grosor del revestimiento ...
Read more

Watch & Learn
About the product
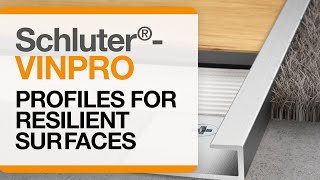
Schluter®-VINPRO: Profiles for resilient floor and wall coverings
Find some existing tutorials and project documentation videos to learn how-to get the best out of our products - for more fun in your life, start now!
Watch more videos / playlists


