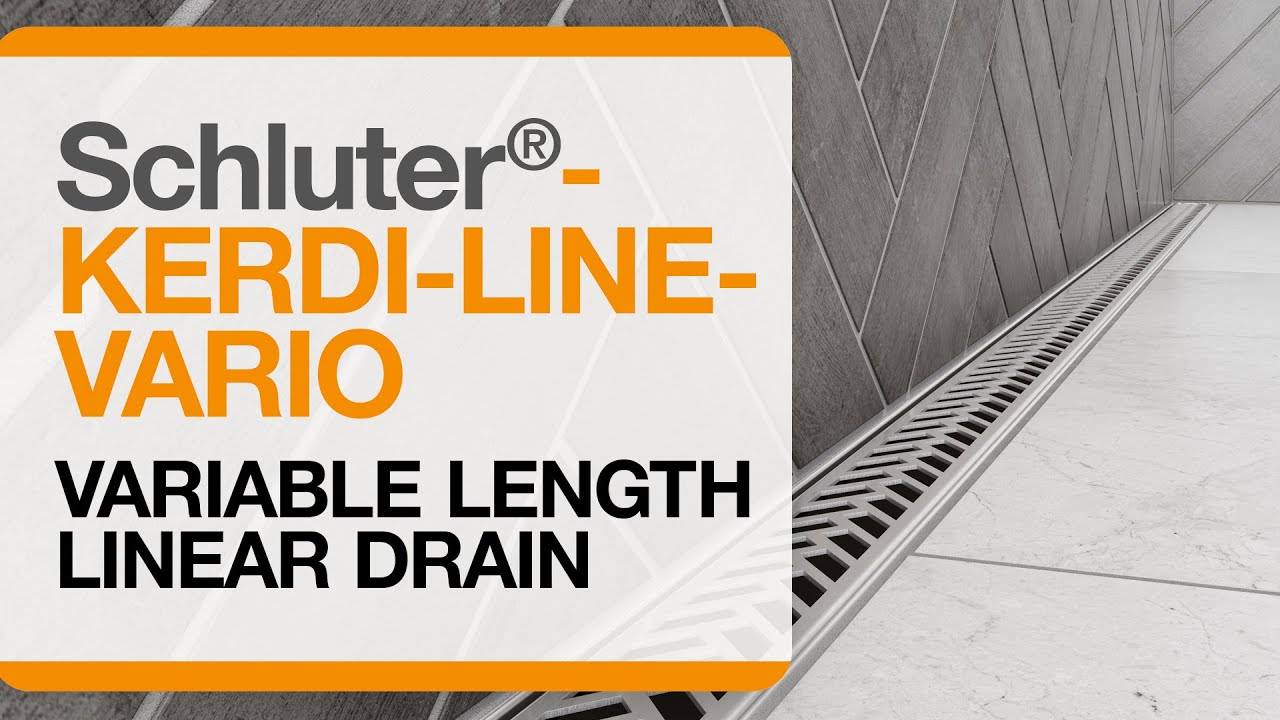
Schluter®-KERDI-LINE-VARIO
Variable length linear drain for tiled showers

- Grate and channel assembly offered in lengths of 4’ and 8’, and can easily be cut to size on-site
- Slim design: only 1-11/16” (43 mm) wide
- Suitable for wall-adjacent and center drain placement
- End caps provided for trimmed edges, creating a clean, finished look
- Four grate designs available in brushed stainless steel and 9 TRENDLINE colors: HERRINGBONE, SLANT, SQUARE and FLORAL
- Flange kit includes integrated KERDI collar for a secure, waterproof connection, as well as both PVC and ABS couplings
- Flange can be placed wherever desired as per the position of the drainage outlet
- Grate and channel kit, and flange kit must be purchased separately
- Optional strainer and grate guards available for simplified installation and system protection


Find recommended accessories here
Shower System Estimator
Calculate all you need for your shower project.
Schluter®-KERDI-LINE-VARIO is a low-profile, variable length linear shower drain specifically designed for bonded waterproofing assemblies. KERDI-LINE-VARIO can be initially cut to size on-site to fit the specific dimensions of the shower. The floor can be sloped on a single plane to KERDI-LINE-VARIO, which enables the use of large format tiles and creates interesting design opportunities. KERDI-LINE-VARIO is best suited for placement against the wall but can also be installed in the center of the shower. For drain placement at the entrance of the shower, please refer to the KERDI-LINE linear drain.
KERDI-LINE-VARIO consists of a polypropylene flange, a formed stainless steel channel, a stainless steel grate, and stainless steel end caps for applications involving trimmed lengths.
The KERDI-LINE-VARIO flange comprises an injection molded polypropylene drain body featuring a standard 2" (50 mm) NPT outlet, which attaches to a standard, threaded, mechanical coupling to allow for an adhesive chemical bond to the drainpipe. KERDI-LINE-VARIO is supplied with PVC and ABS couplings. The simple connection makes KERDI-LINE-VARIO suitable for new construction and renovations. The perimeter of the polypropylene flange consists of a bonding flange laminated with a collar made of KERDI. This ensures a simple and secure connection to the bonded waterproofing assembly, both in the floor area and on adjacent walls. The KERDI-LINE-VARIO flange kit contains corresponding polystyrene foam supports to set the drain elevation to the corresponding KERDI-SHOWER-LT/-LTS shower trays.
The KERDI-LINE-VARIO channel features a formed stainless steel design 1-11/16" wide by 3/8" high (43 mm wide by 10 mm high) with a drainage opening cut in the center. The channel comes in lengths of 48" and 96" (122 cm and 244 cm) and is designed to be trimmed to length to ensure a proper fit in custom applications. The flange outlet may be positioned anywhere within the overall trimmed length of the channel to avoid obstacles encountered during construction (e.g., floor joists).
Note: The KERDI-LINE-VARIO channel minimum recommended tile thickness is 3/8" (10 mm). The shortest allowable length to cut the channel and grate is 10" (25.4 cm).
The KERDI-LINE-VARIO grate is a formed stainless steel design that nests into the corresponding channel. The overall length of the grate must be trimmed to the same length as the channel. If the grate is trimmed, the supplied end caps should be used to provide a clean finished look. The KERDI-LINE-VARIO grate assembly features a minimal reveal after installation is available in four designs: SQUARE, FLORAL, HERRINGBONE and SLANT, in a brushed stainless steel (EB) or textured color-coated finishes. The KERDI-LINE-VARIO Grate Guards allow for flexibility during the installation of the channel body in relation to the surrounding tiles. Using the Grate Guards will allow for conventional installation of the floor tiles prior to any courses of wall tile, by filling the void created by the overlay of wall tiles over the channel body.
KERDI-LINE-VARIO requires no special maintenance and is resistant to mold and fungi. The grate may be removed to clean the drain housing and the drain pipes.
Clean the grates using pH neutral cleaners. Avoid the use of strong acids (e.g., hydrochloric, hydrofluoric) and bases/ alkaline cleaners (e.g., bleach, ammonia, chlorides). Do not use abrasive cleaning agents and tools. Even stainless steel requires periodic cleaning, which will maintain a neat appearance and reduce the risk of corrosion. Stainless steel surfaces develop a sheen when treated with a chrome-polishing agent.
Instructions for installation with a mortar bed can be found under the “downloads” tab in the “handbooks” section under the name “KERDI-LINE-VARIO Installation – Mortar-Mortier-Mortero”.
Installation with prefabricated shower tray
- Use caution when handling the grate and channel as the edges may be sharp.
- Do not twist, warp, or bend grate and channel.
- Overall KERDI-LINE-VARIO channel height is 3/8" (10 mm). Suggested minimum tile thickness is 3/8" (10 mm).
Preparation
- The substrate must be clean, even, and load bearing. Any leveling must be done prior to shower tray installation. Locate and cut a hole in the substrate for the drain outlet and coupling to the waste pipe using the template provided [3-1/2" (88.9 mm)]. Limit the diameter of the hole to 4" (101.6 mm) maximum to ensure proper support for the tile assembly. When KERDI-LINE-VARIO is installed against the wall, locate the drain outlet hole 1-3/4" (44.45 mm) o.c. from the face of the wall board.
Note: Fill in box outs in concrete floors with dry-pack mortar or concrete. A pipe coupling or similar can be used as a form around the waste pipe. - Template note:
The full sheet includes two perforated templates to be removed and used for installation. One template for outlet/subfloor cutout and one template for the KERDI-LINE-VARIO flange support.
Installation
1. Dry fit the KERDI-SHOWER-LT/-LTS tray. If necessary, cut the tray to size prior to application.
2. Use the template provided as a guide to cut out a section of the tray for the foam support.
3. Wipe down the substrate with a damp sponge. Apply Schluter SET®, ALL-SET®, FAST-SET®, or unmodified thin-set mortar to the substrate using a 1/4" x 3/8" (6 mm x 10 mm) or 3/8" x 3/8" (10 mm x 10 mm) square or U-notched trowel. Place the KERDI-SHOWER-LT/-LTS tray and solidly embed in the mortar. The shower base can also be extended beyond the tray using dry-pack mortar, which is in turn covered with the KERDI membrane.
4. Select the ABS or PVC coupling adapter to match the waste line material and attach to the flange using thread sealing tape or compound.
5. Attach the foam supports to the flange using Schluter®-KERDI-FIX, Schluter SET®, ALL-SET®, FAST-SET®, or unmodified thin-set mortar.
Note: The foam supports only fit one way to align with the off-center flange outlet.
Plumbing Access: When there is no access to the plumbing from below, the flange must be set and connected to the waste line simultaneously according to Step 6. When there is access to the plumbing from below and the waste pipe can be connected after installing KERDI-LINE-VARIO, you may skip Step 6.
Note: If the KERDI-LINE-VARIO flange is installed in advance of the shower tray, the construction cover is used to protect the flange and KERDI collar from any damage that may happen on the work site. The cover can be cut to fit in instances where the flange sits tight to the wall.
The construction cover is secured into place until the next steps of installation resume.
6. Begin by dry-fitting the components; make any necessary modifications to the existing plumbing. Apply the thin-set mortar or KERDI-FIX underneath the foam support. Prepare the adjoining pipe and KERDI-LINE-VARIO per the manufacturer's instructions and connect when installing the flange in Step 7.
7. Install the flange with foam supports and coupling of choice and solidly embed in the thin-set mortar or KERDI-FIX.
Note: If the drain location is desired to be close to the wall, then orient the outlet so the off-set is opposite the wall. Embossed text on the inside of the flange will be legible in the proper orientation. Refer to the template for wall placement.
8. Ensure that the flange and foam support are firmly embedded. Check to ensure the KERDI-LINE-VARIO flange is level. The flange should now be flush with the top of the shower tray.
Waterproofing
9. The KERDI collar on KERDI-LINE-VARIO is integrated with the adjoining waterproofing assembly using Schluter SET®, ALL-SET®, FAST-SET®, or unmodified thin-set mortar. The KERDI collar must be cut and folded where the KERDI-LINE-VARIO is installed at a wall corner and may require trimming to avoid excess build up over the tray recess lip.
10. Remaining seams in the membrane are constructed by overlapping the edges by 2" (50 mm) or by abutting adjacent sheets and installing KERDI-BAND with thin-set mortar, centered over the joint.
Note: A flood test is strongly recommended before setting tile to verify a successful installation. Wait a minimum of 24 hours after the membrane installation is complete to allow for final set of thin-set mortar and ensure waterproof performance at seams and corners. Refer to local plumbing codes for any specific requirements in your area.
Note: A specialized inflatable bladder style drain plug works best with KERDI-LINE-VARIO.
Channel and Grate Assembly (without grate guards)
11. Determine the tile layout and install the first course of tile on the back and side walls.
Note: To protect the finished surfaces of either brushed stainless steel or color coated stainless steel KERDI-LINE-VARIO Channel Body/Grates, consider applying painters tape to the cut line prior to making any cuts. For best results, minimize heat build up during cutting operations.
12. Determine the centerline of the drain flange and the centerline of the channel body/grate at the drain opening, and temporarily mark. Measure from the center mark of the flange to the tiled surface on each wall and transfer each measurement to the channel body/grate, measuring from the center mark. Leaving a 1/16”-1/8” (1.5-3 mm) gap at each wall, cut the channel and grate to the measured length(s). Verify that the drain opening on the channel body is positioned over the flange opening. Example: if the channel is to be 36" (91 cm) long and the flange opening is centered, cut 6" (152 mm) from both ends of a 48" (122 cm) channel and grate.
Note: The shortest allowable length to cut the channel and grate is 10" (25.4 cm).
Caution: The cut ends may be jagged or sharp; use a metal file to remove any burrs or sharp edges. Utilize applicable safety equipment and use care when making cuts. See the Cutting KERDI-LINE-VARIO section for additional guidance.
13. Press the stainless-steel end cap(s) to the cut end(s) of the grate and set aside in a safe location until it is time to install in the channel body.
Note: End caps are compression fit and do not require any adhesive to install.
14. Center and attach the black downspout to the bottom of the channel using the provided two-sided tape.
Note: Use the included foam spacer block to aid in aligning the downspout opening to the channel body opening during the attachment step.
15. Dry fit and mark where the channel will be placed. Then, install a row of tile adjacent to the channel position on the shower floor using thin-set mortar.
16. Using a notched trowel, liberally apply thin-set mortar to the substrate and to the back side of the channel. Schluter SET®, ALL-SET®, FAST-SET, or unmodified thin-set mortar will be used to adjust to the required height of the channel to accommodate the thickness of the tile.
17. Embed the channel into the thin-set mortar until it is flush with or slightly lower than the adjacent tile. Check to ensure the channel is level and the 1/16"-1/8" (1.5 mm-3 mm) gap is accomodated for along the perimeter.
Note: Wipe out all excess thinset.
18. Install all remaining tile on the shower floor and then the shower wall surfaces. Apply grout and clean up the work area. Insert the grate into the channel body and wipe down any remaining smudges or marks from the work done during the install.
Channel and Grate Assembly (using Grate Guards)
11. Determine the centerline of the drain flange and the centerline of the channel body at the drain opening and temporarily mark them. Measure from the center mark of the flange to each waterproofed wall surface and transfer the measurements to the channel body, measuring from the center mark. Leaving a 1/16”-1/8” (1.5-3 mm) gap at each wall, cut the channel body to the measured length. Verify that the drain opening is positioned over the flange opening. Example: if the channel is to be 36" (91 cm) long and the flange opening is centered, cut 6" (152 mm) from both ends of the 48" (122 cm) channel body.
Note: The shortest allowable length to cut the channel and grate is 10" (20 cm) for shower applications.
Caution: The cut ends may be jagged or sharp; use a metal file to remove any burrs or sharp edges. Use applicable safety equipment and use care when making cuts. See the Cutting KERDI-LINE-VARIO section for additional guidance.
12. Center and attach the black downspout to the bottom of the channel using the provided two-sided tape.
Note: Use the included foam spacer block to aid in aligning the downspout opening to the channel body opening during the attachment step.
13. Dry fit and mark where the channel will be placed. Then, install a row of tile adjacent to the channel position on the shower floor using thin-set mortar.
Note: For wall placement, be sure to account for wall tile thickness, appropriate mortar thickness for tile installation, and a gap of 1/16”-1/8” (1.5-3 mm) along the back of the channel body.
14. Using a notched trowel, liberally apply thin-set mortar to the substrate and to the back side of the channel. Schluter SET®, ALL-SET®, FAST-SET®, or unmodified thin-set mortar will be used to adjust to the required height of the channel to accommodate the thickness of the tile.
15. Embed the channel into the thin-set mortar until it is flush with, or slightly lower than, the adjacent tile. Check to ensure the channel is level and the 1/16"-1/8" (1.5-3 mm) gap is accommodated for along the perimeter. Ensure the foam block remains in the downspout until the mortar has hardened.
Note: For wall placement, account for wall tile thickness, appropriate mortar thickness for tile installation, and a gap of 1/16”-1/8” (1.5-3 mm) along the back of the channel body.
Note: Wipe out all excess thin-set.
16. Install all remaining tile on the shower floor and then shower wall surfaces using preferred methods.
17. Apply a 1/4” (6 mm) to 3/8” (10 mm) bead of KERDI-FIX (Schluter SET®, ALL-SET®, FAST-SET®, or unmodified thin-set mortar is also acceptable) into the voids created at the channel body and wall tile interface. Ensuring the hollow pockets face the wall, insert the Grate Guards into each pocket with the V-shape down, matching the profile of the channel body. Push the Grate Guards into the pocket until the front surface is flush with the wall tile surface.
Note: Wipe up any excess setting material that may have squeezed out during grate guard installation.
18. Apply grout and clean up the work area.
19. Measure the distance between tiled wall surfaces over the installed channel body. Transfer the measurement to the grate that was set aside. Leaving a 1/16”-1/8” (1.5-3 mm) gap at each wall, cut the grate to the measured length.
Note: It is recommended to trim material off the grate from each end to achieve the desired width to ensure consistent visuals once end caps are installed.
Caution: The cut ends may be jagged or sharp; use a metal file to remove any burrs or sharp edges. Use applicable safety equipment and use care when making cuts. See the Cutting KERDI-LINE-VARIO section for additional guidance.
20. Press the stainless-steel end cap(s) to the cut end(s) of the grate.
Note: End caps are compression fit and do not require adhesive for installation.
21. Insert the grate into the channel body.
Note: To protect the finished surfaces of either brushed stainless steel or color coated stainless steel KERDI-LINE-VARIO Channel Body/Grates, consider applying painters tape to the cut line prior to making any cuts. For best results, minimize heat build-up during cutting operations.
Cutting KERDI-LINE-VARIO
Observe all safety instructions and standards as directed by the cutting tool manufacturer including protective eyewear, hearing protection, and gloves. Always measure carefully and dry fit the channel and grate after cutting to ensure proper fit and alignment prior to installation.
KERDI-LINE-VARIO may be cut using the following options:
- Variable-speed angle grinder set to a medium-low speed using the Schluter®-PROCUT-TSM cutting wheel or alternative cutting wheel suitable for stainless steel.
- Band saw with a blade suitable for cutting stainless steel.
- Hack saw with a blade suitable for cutting stainless steel.
Note:To protect the finished surfaces of either brushed stainless steel or color coated stainless steel KERDI-LINE-VARIO Channel Body/Grates, consider applying painters tape to the cut line prior to making any cuts. For best results, minimize heat build up during cutting operations.
Brochures and Pamphlets
FAQ
Can I use another manufacturer’s drain with your Schluter®-Shower System?
The Schluter®-KERDI-DRAIN, Schluter®-KERDI-LINE, Schluter®-KERDI-LINE-VARIO drains are specifically designed to integrate with the Schluter®-Shower System...
Read moreWhy should I use the Schluter®-Shower System?
The Schluter®-Shower System is an integrated family of products that together form a fully bonded, watertight assembly for tiled showers...
Read moreWhat design and finish combinations are offered for the KERDI-LINE-VARIO grates?
There are presently four different designs: SLANT, SQUARE, FLORAL and HERRINGBONE. All offered in...
Read moreWhat is provided in each KERDI-LINE-VARIO kit?
What size diameter is the cut-out on the sub-floor for the KERDI-LINE-VARIO drain outlet?
The subfloor template for KERDI-LINE-VARIO is 3 ½” (88.9 mm) but the max is 4” (101.6 mm)...
Read moreCan KERDI-LINE-VARIO be used as a secondary drain?
No, this product should not be used as a secondary drain.
What is shortest allowable length for KERDI-LINE-VARIO?
The shortest allowable length to cut the channel and grate is is 10" (25.4 cm).
Can KERDI-LINE-VARIO be integrated or used with the KERDI-LINE products?
No, KERDI-LINE-VARIO is its own individual product line and cannot be utilized with any existing products.
Are there any limitations to the GPM of the showerhead/water supply system output for the KERDI-LINE-VARIO drain?
KERDI-LINE-VARIO drains are designed to meet the International Plumbing Code (IPC) guideline for a single standard showerhead for a maximum flow of 2.5 gpm.
Read moreHow do I select the right KERDI-LINE-VARIO length of channel and grate if my drainage outlet is not centered?
KERDI-LINE-VARIO: needs to be placed such that the opening in the center of the channel is directly above the flange connected to the drainage outlet.
Read moreTips on cutting the KERDI-LINE-VARIO channel and the grate?
For the channel, always measure from the center of the drain out to ensure a proper fit/alignment with the drain body. For the grate...
Read moreDo I really need to tile the walls first before I install my KERDI-LINE-VARIO drain?
It’s recommended that you tile the walls first as this will make lining up the KERDI-LINE-VARIO drain easier...
Read moreIs KERDI-LINE-VARIO acceptable for curbless shower applications?
Yes, however we do not recommend an entrance drain placement.
What is the minimum height that the KERDI-LINE-VARIO can be installed from the tray up?
The minimum height for installing the KERDI-LINE-VARIO is 3/8” (9.5 mm).
What is the purpose of the KERDI-LINE-VARIO cleaning brush?
The KERDI-LINE-VARIO cleaning brush is a useful tool not only if the homeowner wants to clean the “nooks and crannies” of the drain channel...
Read moreDoes the KERDI-LINE-VARIO channel and grate assembly have to be installed wall-to-wall or can it be installed in shorter lengths?
No. The KERDI-LINE-VARIO channel and grate assembly does not need to be installed wall-to-wall. It may be installed at...
Read more
Product Evaluations and Listings
Schluter(R)-KERDI-LINE-VARIO is listed by UPC(R)
Schluter(R)-KERDI-LINE-VARIO is listed by ICC-ES - PMG-1204

Watch & Learn
About the product
Schluter®-KERDI-LINE-VARIO: The Variable length linear drain!

Schluter®-KERDI-LINE-VARIO is TOTALLY ON TREND!

How to install the Schluter®-KERDI-LINE VARIO Linear Drain
Find some existing tutorials and project documentation videos to learn how-to get the best out of our products - for more fun in your life, start now!
Watch more videos / playlists


